Jump to your step
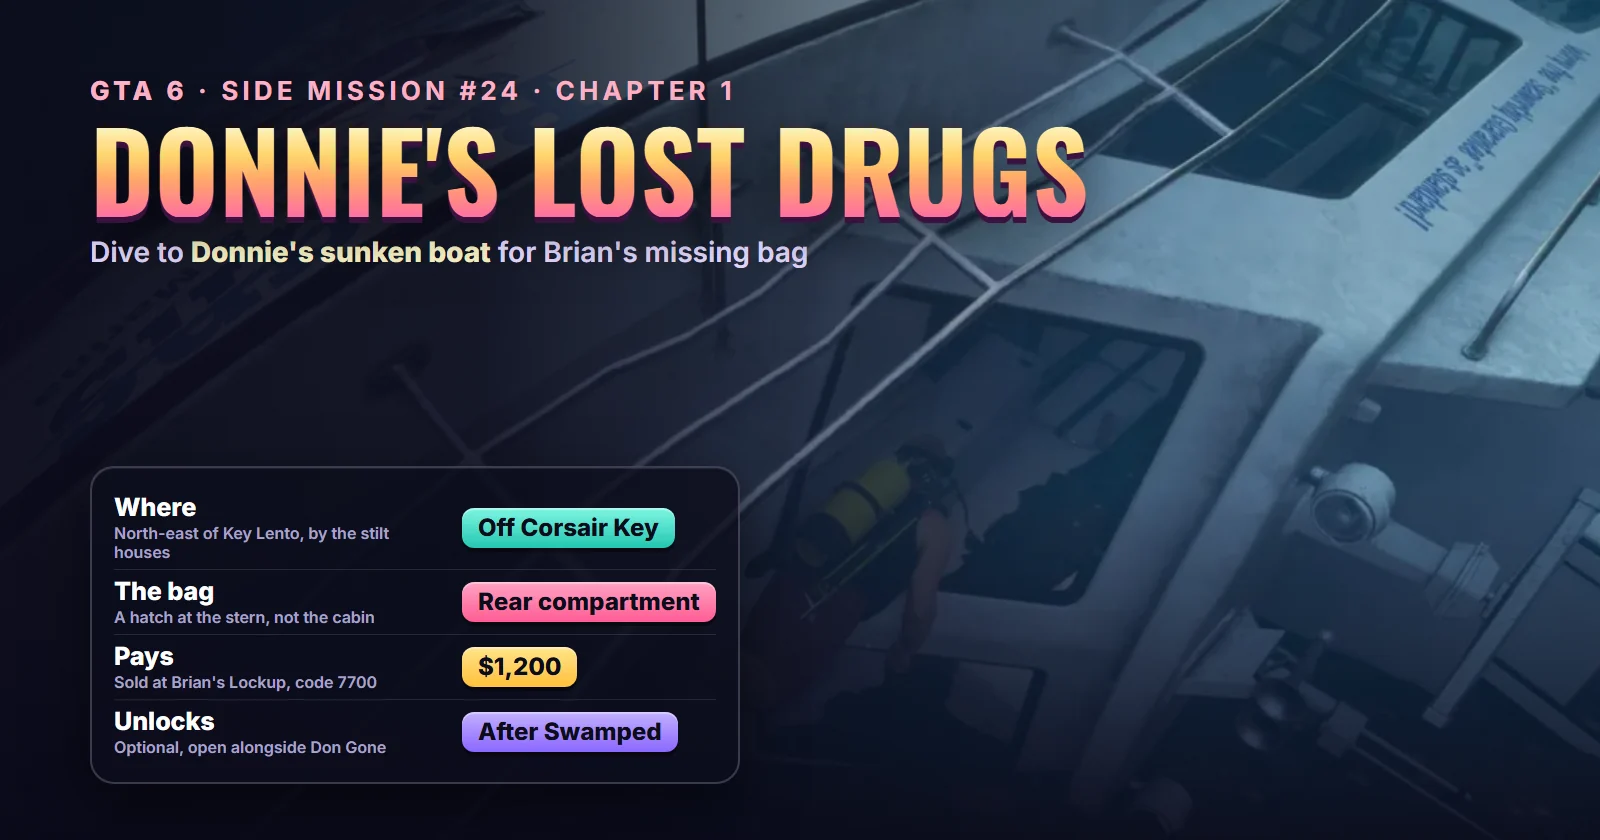
Donnie’s Lost Drugs: quick facts
| Mission | Donnie’s Lost Drugs, story mission #24 in the mission database |
| Chapter | Chapter 1, late (after Swamped) |
| Type | Optional side mission |
| You play as | Jason Duval |
| Given by | Brian Heder (no call or meeting: it appears on the map) |
| Where it starts | A pink search circle in the Atlantic off Corsair Key, north-east of Key Lento |
| Unlocks after | Swamped (#22); open alongside Don Gone (#23) |
| Unlocks next | Nothing new; the story carries on with Recalibration (#25) |
| Length | About 10 minutes, most of it travel |
| Reward | $1,200 for the stash bag at Brian’s Lockup |
| Trophy | None |
| Required for 100% | Yes, according to the mission database |
Mission briefing How it unlocks, where the search circle is, and how it differs from the other lost-drugs missions. Contains spoilers for Swamped.
How to unlock Donnie’s Lost Drugs
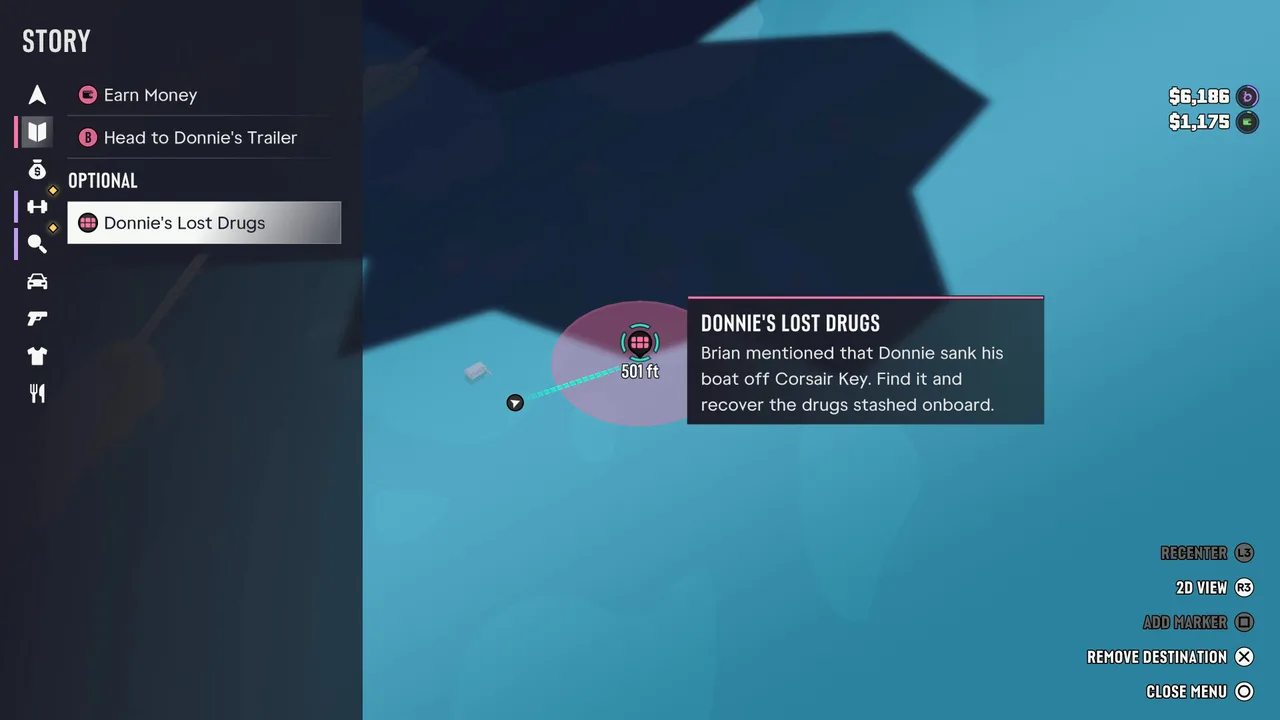 Donnie’s Lost Drugs sits under Optional, next to Don Gone’s “Head to Donnie’s Trailer”. Footage: GameRiot.
Finish Swamped. Nobody phones you: the mission simply shows up under Optional in the Story task list on the pause map, below Don Gone’s “Head to Donnie’s Trailer”. Its icon is a pink stash-bag symbol, and the card explains the job: Brian said Donnie’s boat went down off Corsair Key with drugs still aboard, and he wants them recovered.
You can do it before or after Don Gone. GameRiot dived first and drove to Donnie’s trailer afterwards; the mission database lists it after Don Gone. Nothing in either run suggests the order matters, so do it whenever you’re near the water.
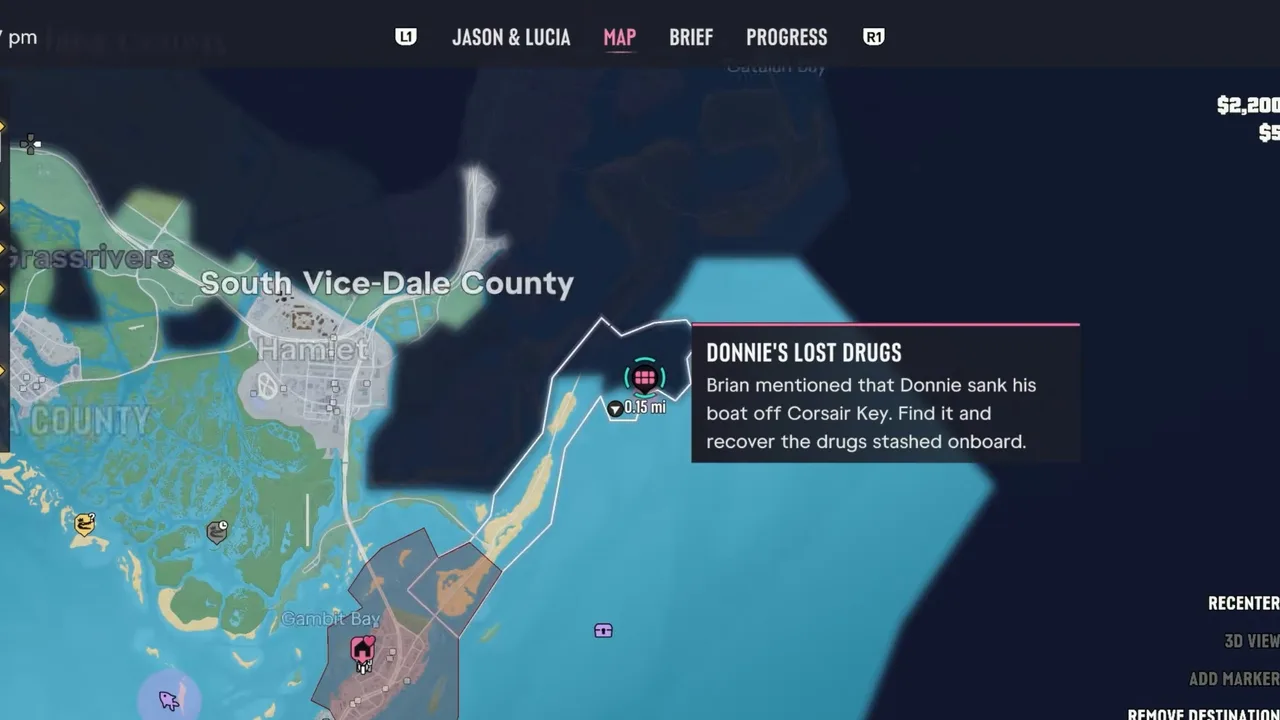 The search area lies off Corsair Key, the long, thin island north-east of Key Lento. Footage: Trophy Tom.
Where it starts: there’s no giver to visit. The pink search circle sits in the Atlantic just off Corsair Key, the long, thin island that runs north-east from Key Lento, among the stilt houses out on the flats. It doesn’t have its own marker on our map yet. Brian’s usual spots in the Keys are here: show Brian on the live map.
The story so far
Spoiler for Swamped: Donnie is dead, and Brian has shut the smuggling side of the business down. Before that, Donnie lost a boat off Corsair Key with a stash still aboard, and Brian would rather have the money than leave it on the seabed. In Swamped, Brian also grumbles that Donnie was meant to be salvaging a wreck for him out by the stilt house. The search circle sits right beside the stilt houses, so this may be that wreck, but the game doesn’t say so outright.
The wreck itself is one of Brian’s: GameRiot’s footage shows Brian’s Boat Works & Marina lettering down the hull. More on the cast in our characters guide.
Not the same as Find the Lost Drugs or Clean Up After Donnie
Three Chapter 1 missions are about Donnie’s missing cocaine. Clean Up After Donnie (#14) is the first beeping package near Hamlet and the Kingfishers’ shack, and Find the Lost Drugs (#17) is the four-area swamp search for eight packages. This one is a single dive to his sunken boat.
About this guide: it follows Trophy Tom’s complete run, from the map to the sale, with GameRiot’s 4K playthrough for the dive and the boat’s gear. iPodKingCarter’s run shows where to find scuba gear if your boat has none. SpaceQT’s guide matches our runs on the location but uses unrelated footage, so we only took its directions.
Step 1: Get a boat and head for Corsair Key
The objective is Search underwater for the cocaine. Don’t swim out. The circle is a long way offshore from Key Lento, and you’ll want a boat at the wreck anyway so you can get back. Take one from the shoreline or a dock near the stilt houses. iPodKingCarter stole a speedboat; Trophy Tom and GameRiot both turned up in the same small white centre-console.
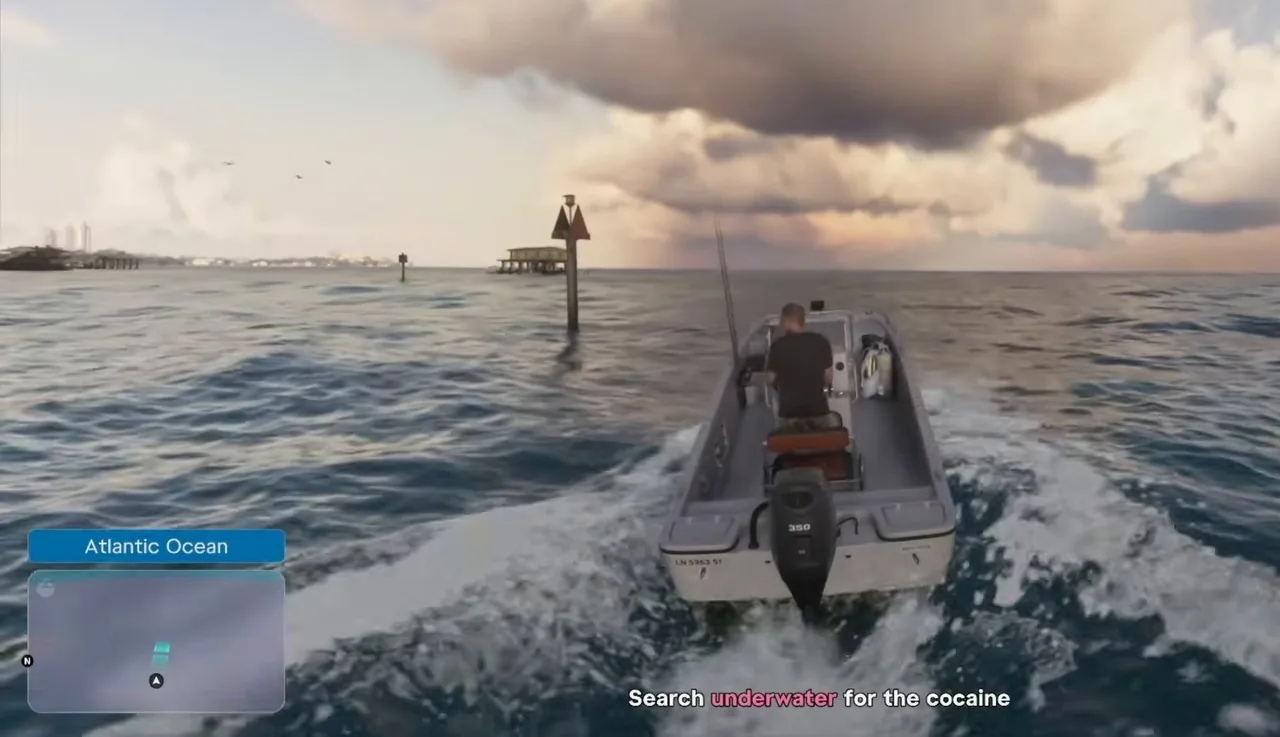 Out past the channel markers, with the stilt houses ahead. Footage: Trophy Tom.
Set the circle as your destination on the pause map and follow the route. The stilt houses standing on the flats make a good landmark: the circle is just beyond them, off the side of Corsair Key facing the open sea. Trophy Tom’s map read 0.15 miles to the blip when he was nearly there.
Step 2: Gear up for the dive
The wreck is deep enough that diving on a single breath is a struggle, so put on scuba gear before you go down. You can get it two ways.
From the boat. The small centre-console both Trophy Tom and GameRiot used (the HUD calls it a Bombora S23 CCS) carries a dive bag. Stand in the back and you get Fishing Rod, Radio, Clothes and Take Tank prompts. Clothes puts Jason in a tank, mask and fins, and the feed confirms + Arras Bullhead (the harpoon gun from Island Dreams) and + Metal Detector. Changing also clears any outfit heat the police had on you.
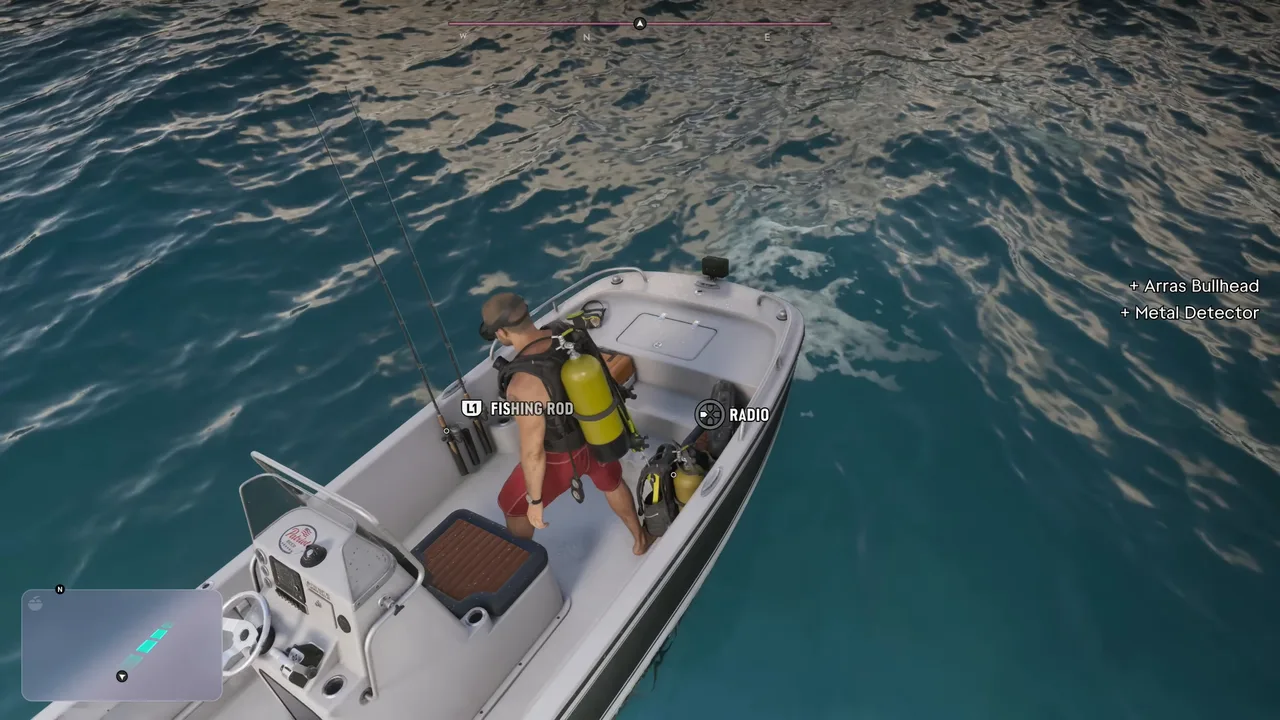 The boat’s dive bag adds the harpoon gun and a metal detector. Footage: GameRiot.
From a dock. iPodKingCarter’s speedboat had no gear, so he looked around the stilt houses and found a Scuba Gear prompt on a cooler at the end of a jetty, about 440 feet from the search circle. He swam the rest of the way from there.
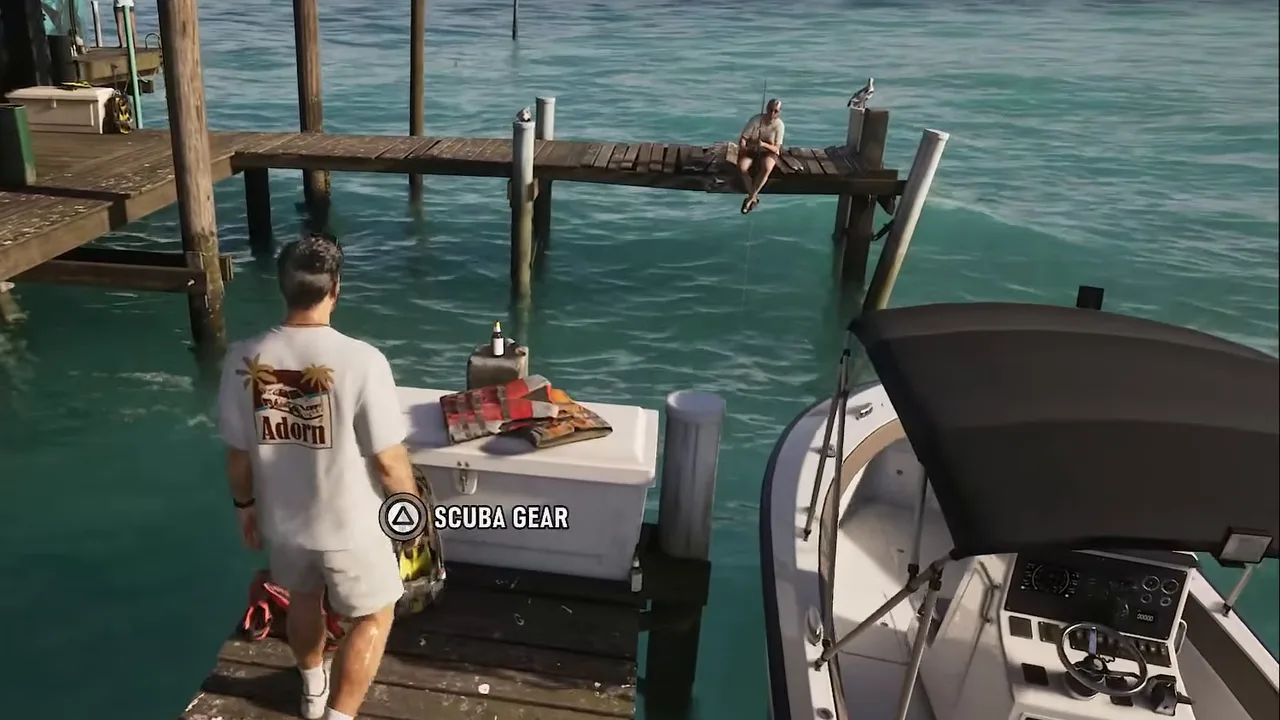 A Scuba Gear pickup on a stilt-house jetty near the circle. Footage: iPodKingCarter.
Keep the Arras Bullhead handy. GameRiot saw sharks on the way down, and iPodKingCarter had one come at him near the wreck.
Step 3: Dive in the south-east of the circle
Stop the boat inside the pink circle and dive. The oxygen bar is in the top left. With a tank it lasts long enough to search, and you can swap in a full one with Take Tank back on the boat.
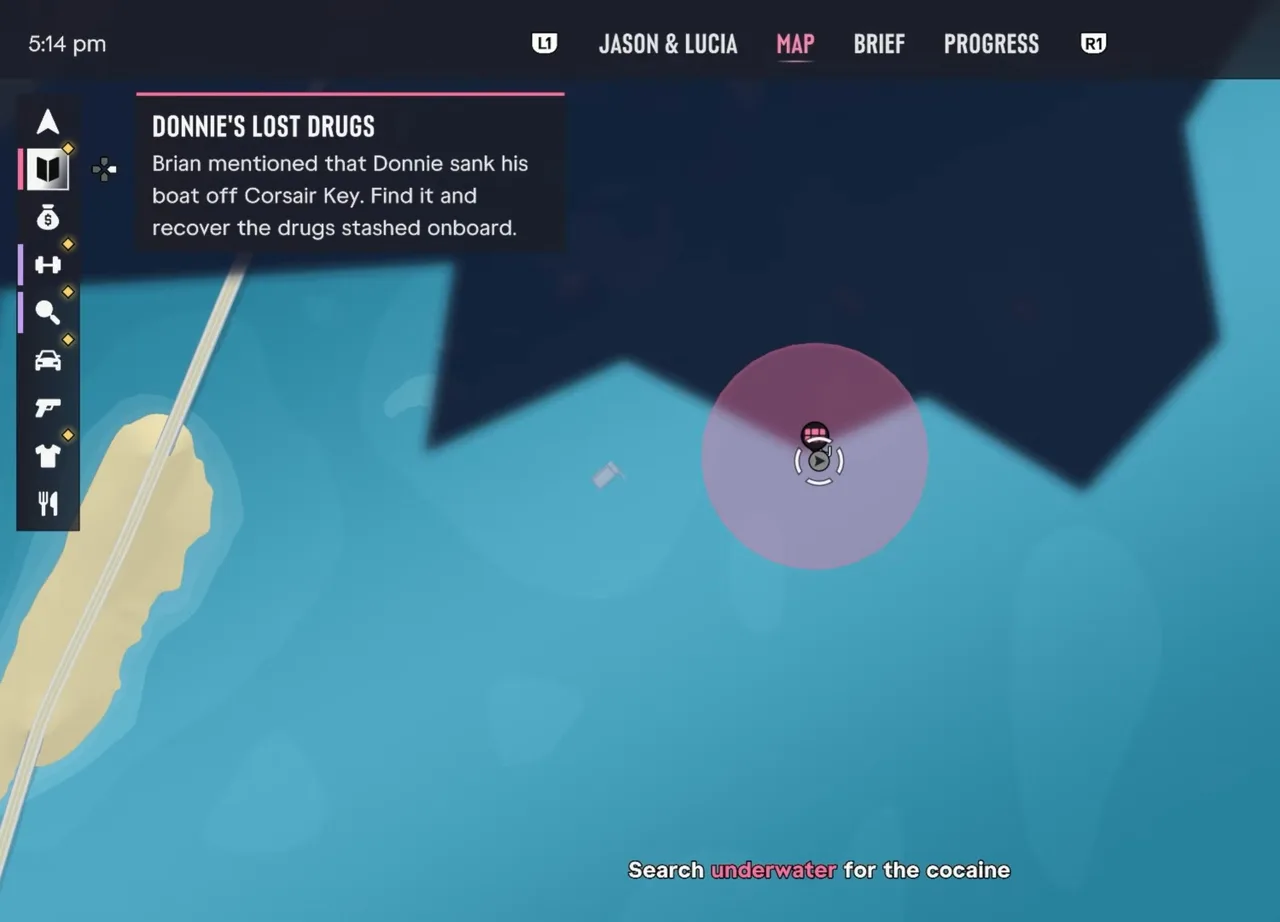 Trophy Tom dived near the middle of the circle. The wreck lay a short swim south-east. Footage: Trophy Tom.
The circle is bigger than it looks from the surface, and the water gets murky near the bottom. Head for the south-east part of the circle. That’s where the mission database and SpaceQT place the wreck, and it matches Trophy Tom’s run: he went down close to the middle, swam with his compass pointing south-east, and the hull came into view within about half a minute. GameRiot circled a while before he found it, joking that it was never going to be in the middle.
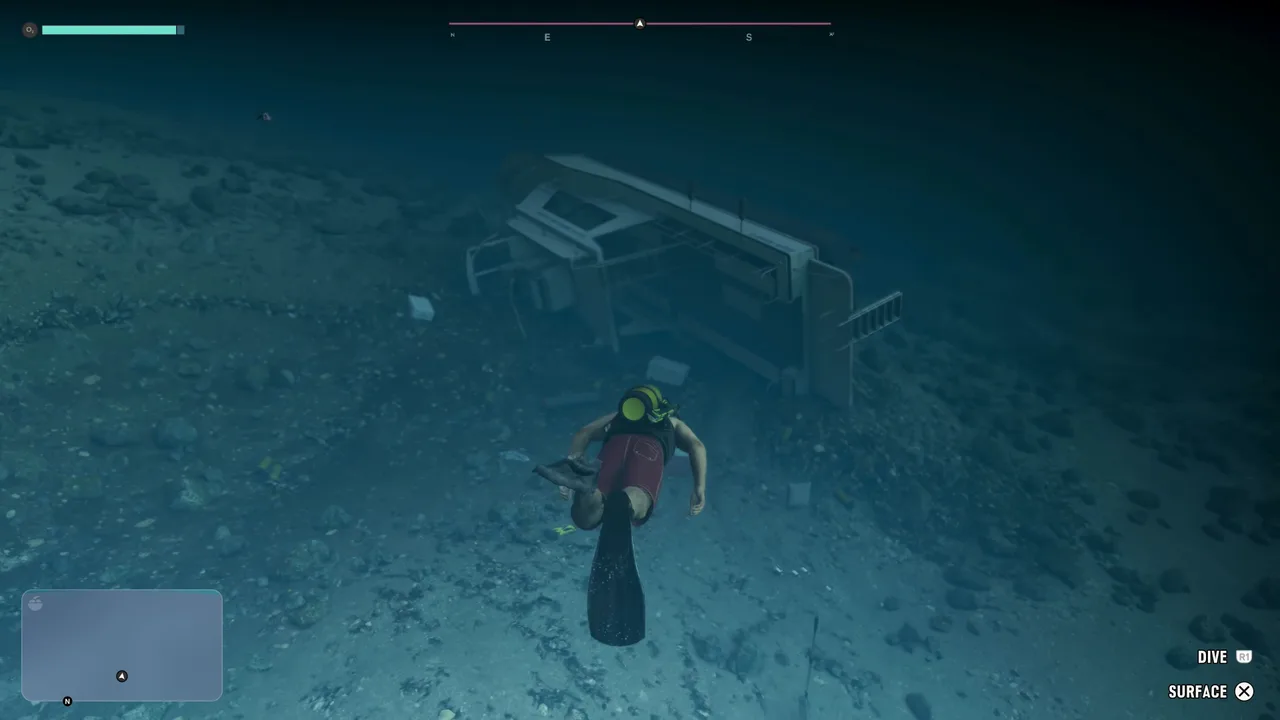 Donnie’s boat comes out of the gloom, lying on its side on a slope. Footage: GameRiot.
You’re looking for a small white cabin boat lying on its side, with coolers and debris scattered around it, not a big shipwreck. Watch the seabed rather than the open water: dolphins, fish and the odd shark will draw your eye.
Step 4: Open the rear compartment and take the bag
This is where most people get stuck. The bag isn’t in the cabin or lying loose on the sand. Swim round to the stern (the back of the boat) and look along the rear deck for a hatch. When you’re close enough, an Open prompt appears.
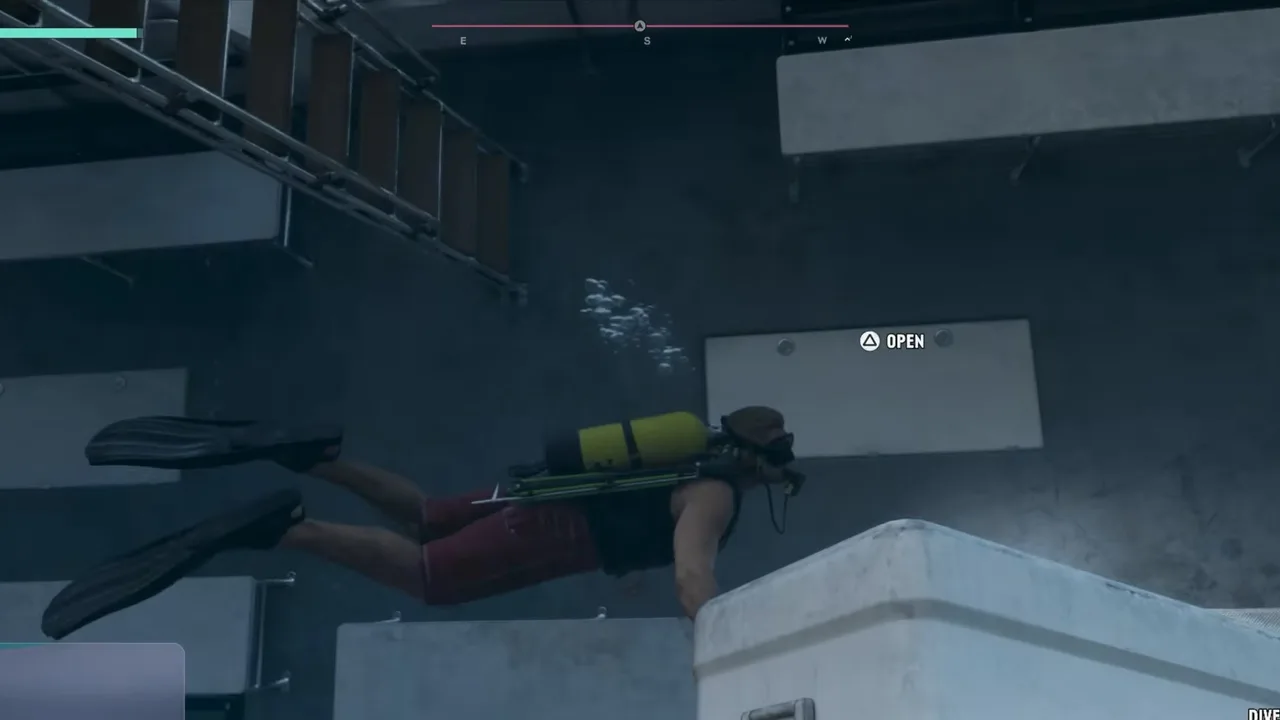 The compartment at the back of the boat. Get close until Open appears. Footage: Trophy Tom.
GameRiot opened the wrong hatch first and found only an empty bottle, so if a compartment is empty, keep checking the others at the back. In the right one, Jason’s torch lights up a dark duffel bag.
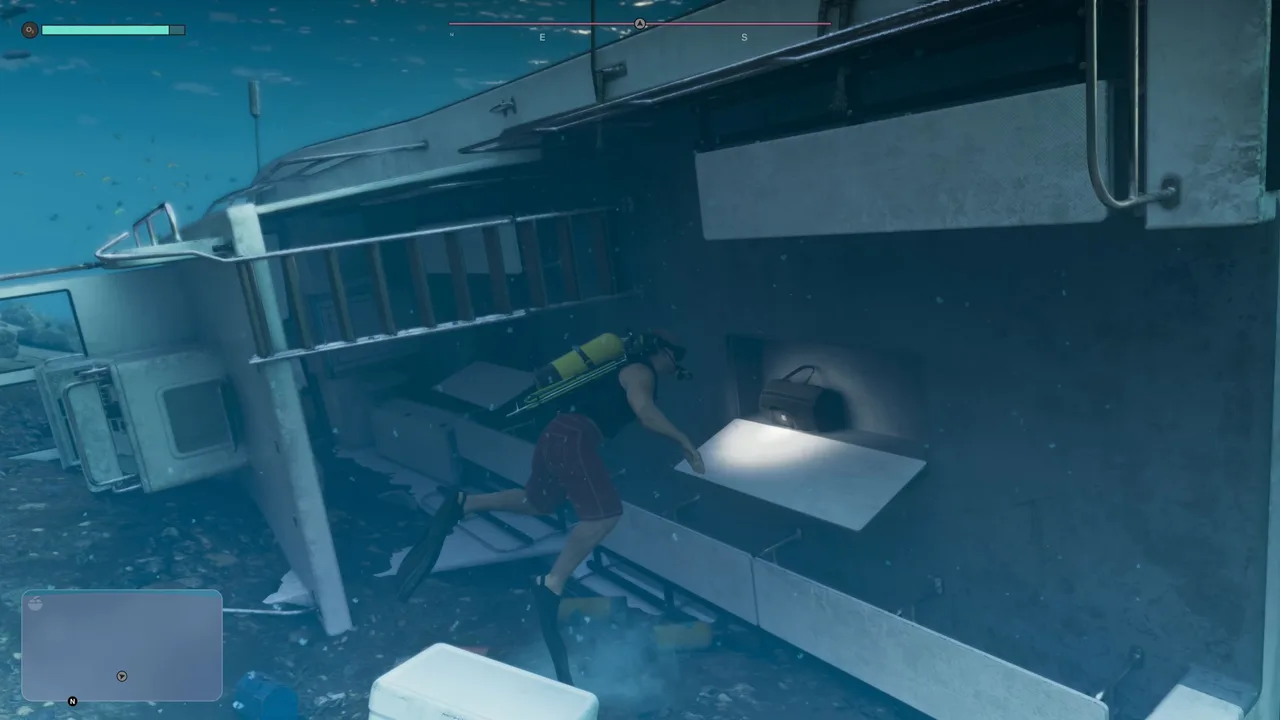 Donnie’s stash bag in the rear compartment. Footage: GameRiot.
Take the bag. A $1,200 stash counter appears in the top right, and Map updated pops up as the game adds Brian’s Lockup to your map. Jason now carries the bag on his back.
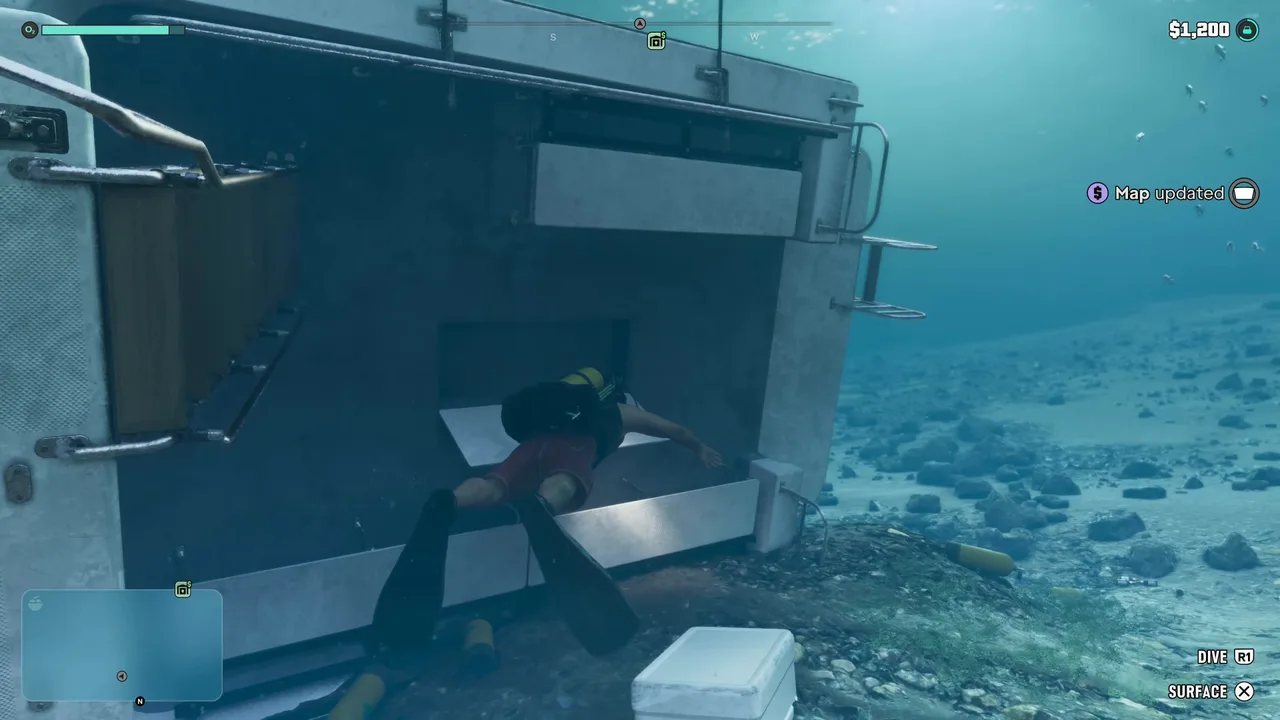 Bag recovered: $1,200 in your stash. Footage: GameRiot.
Step 5: Surface and get back to land
Swim up and climb back aboard (or into whatever you can steal if you swam out). Trophy Tom found his boat drifting a little way off among floating debris. Drive back towards Key Lento.
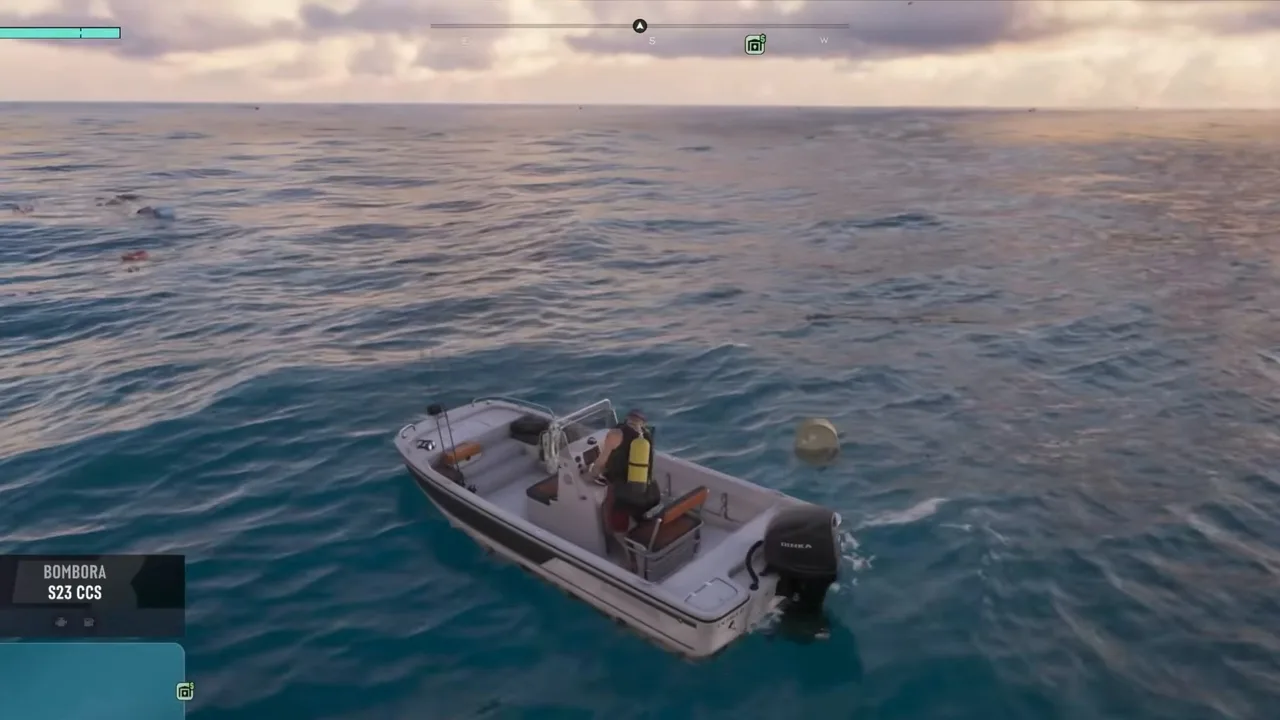 Back in the Bombora and heading for Key Lento. Footage: Trophy Tom.
Try not to die or get wrecked with the bag on you. The stash goes with Jason, so play it safe until you’ve sold it. iPodKingCarter swam the whole way back to shore with the bag. It works, but it’s slow.
Step 6: Drive the bag to Brian’s Lockup
Now open the pause map. Brian’s Lockup shows a green stash icon in Key Lento, and its card shows what he’ll buy: narcotics, jewelry and marked bills. With the bag on you, Trophy Tom’s card read Narcotics $1,200, very low, stash total $1,200.
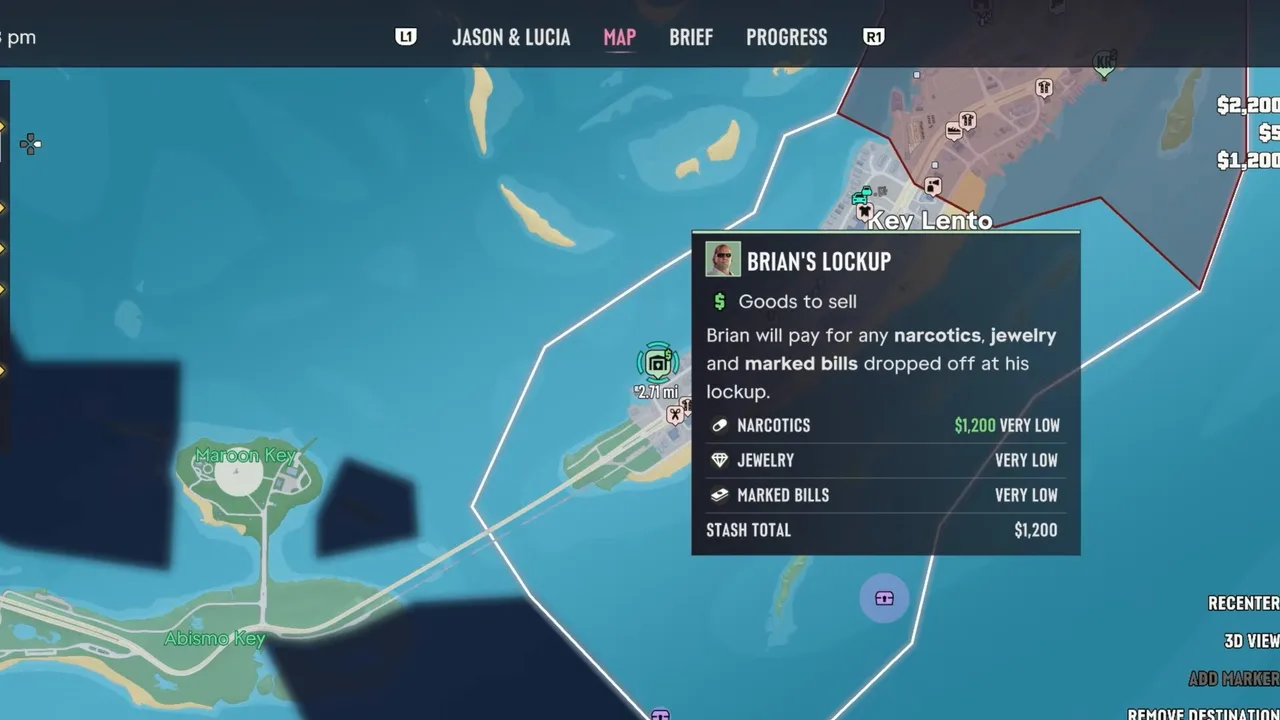 Brian’s Lockup values the bag at its full $1,200. Footage: Trophy Tom.
Trophy Tom docked, took a car and drove over. The lockup is the plain blue building next door to the Isla Tropical Private Club, whose wall has a big painted marlin. The door is down the side of the building.
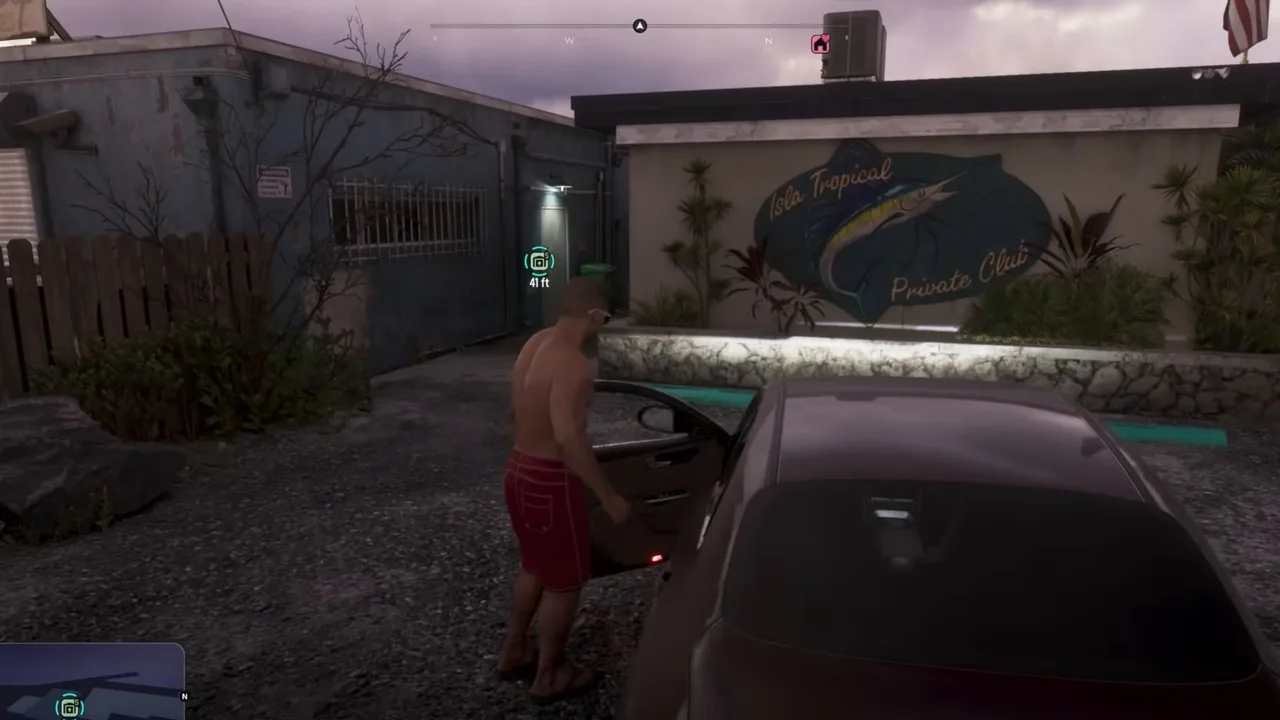 Brian’s Lockup is the blue building beside the Isla Tropical Private Club. Footage: Trophy Tom.
If you put the bag in the car’s trunk, take it out again first: open the trunk and choose Take Stash Bag ($1,200). A side note: when Trophy Tom hovered over Jason’s ’70 Ganado on the map, its card showed an $800 max stash value, less than this bag is worth. We didn’t see what happens if you load a bigger stash into it, and Trophy Tom used a different car.
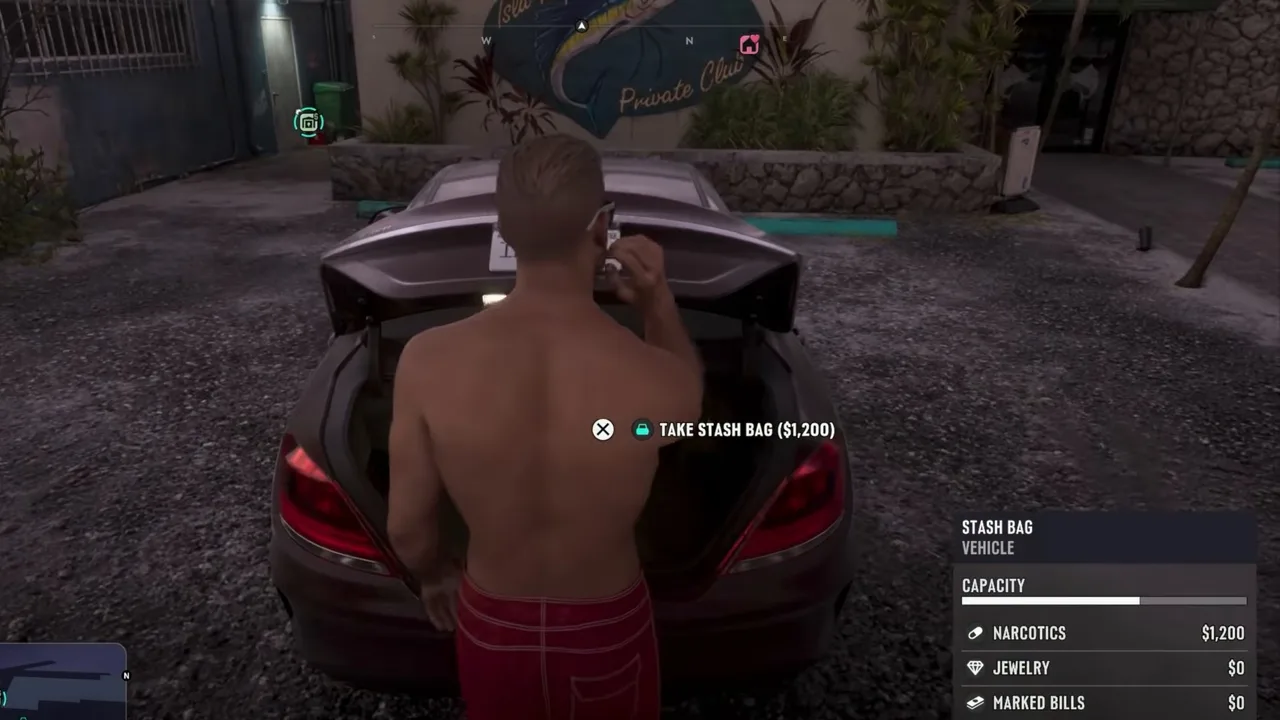 Taking the bag back out of the trunk outside the lockup. Footage: Trophy Tom.
Step 7: Enter code 7700 and sell the stash bag
Walk to the door and use the keypad. The code is 7700, the same one Brian gave you in Lab Fees, and Jason’s Notes show it again at the keypad.
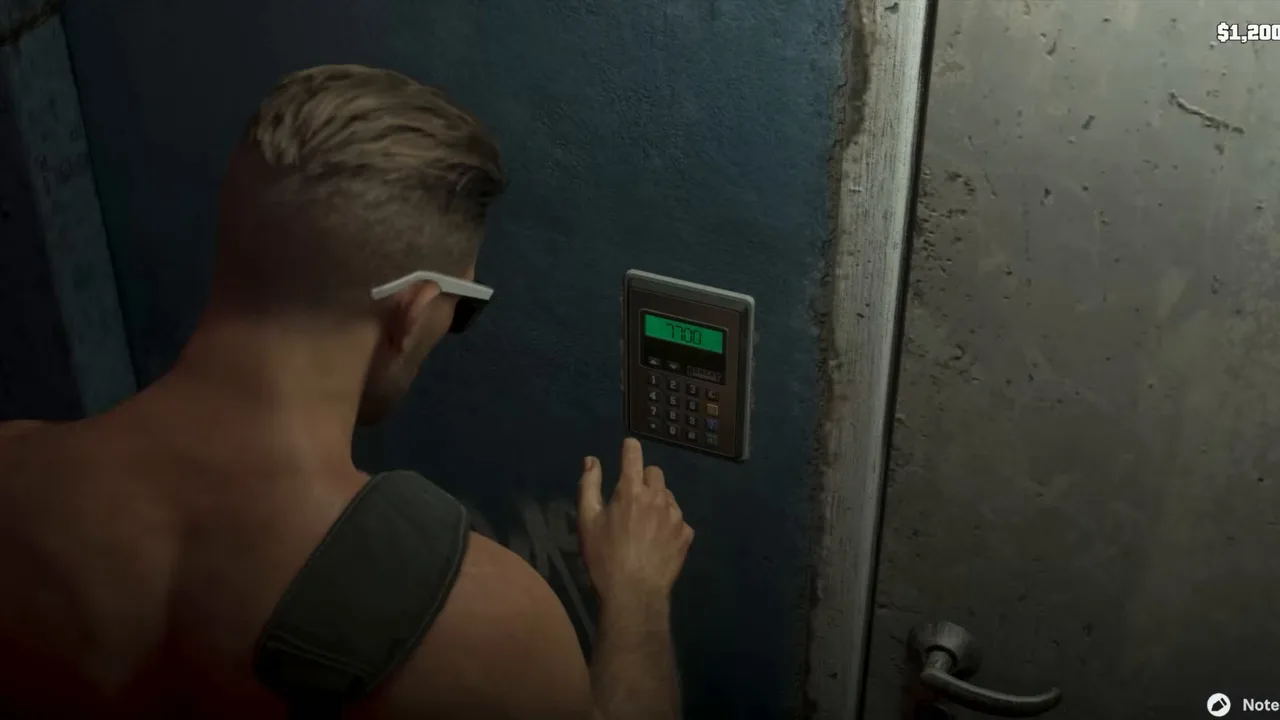 The lockup keypad. The display reads 7700. Footage: Trophy Tom.
Inside, go to the yellow-and-black strong box by the workbench and choose Sell Stash Bag (+$1,200). Jason drops the bag in and the job is done.
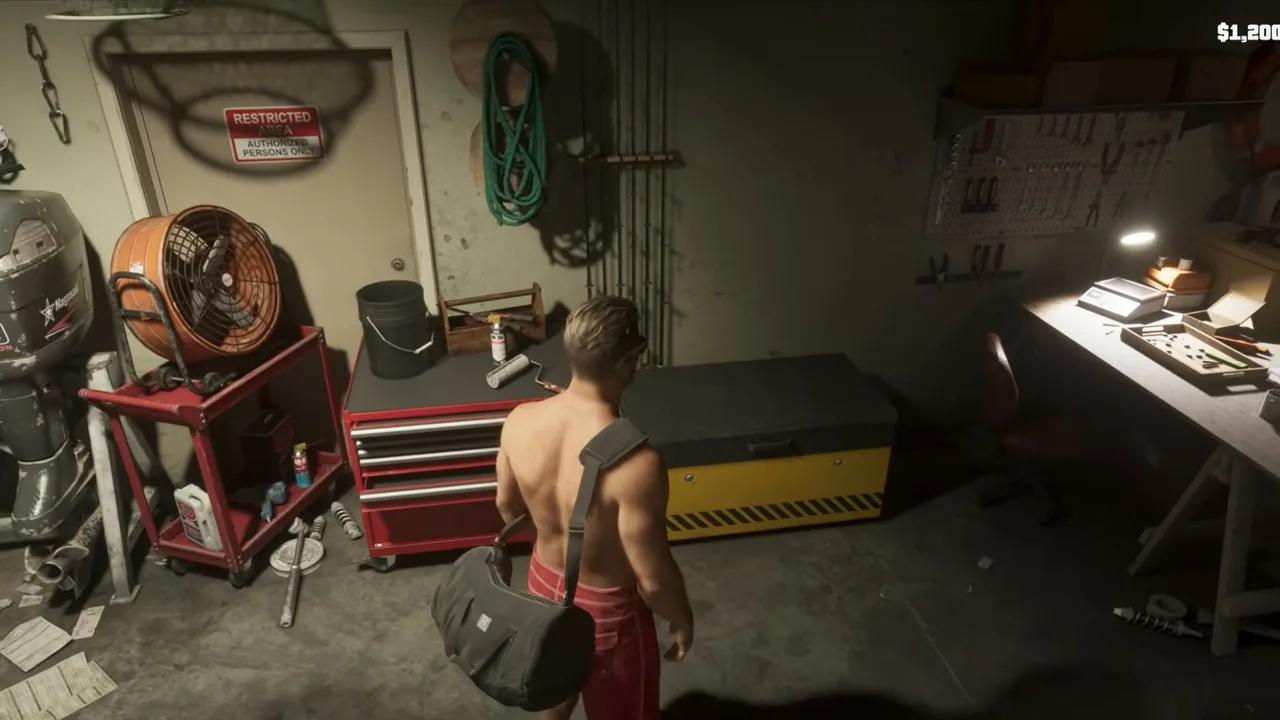 The strong box pays +$1,200. Footage: Trophy Tom.
Trophy Tom’s video ends as the bag goes in, with no mission-passed screen or phone call. When to expect the money is covered below.
Rewards
- $1,200 for the stash bag, the figure on the strong box prompt, the map card and the mission database.
- When it’s paid: Brian’s Lockup is a drop-off. In Lab Fees, goods left there were paid after Brian collected them, and Millzaa reports that lockup drops land in the mailbox at Jason’s house the next day. Check the mailbox if the $1,200 isn’t in your balance straight away. Our money guide explains the mailbox payouts.
- Full price this time: in Find the Lost Drugs, GameRiot’s lockup card offered only $2,720 for a $3,400 haul. Here the card matched the bag’s $1,200 value exactly.
- No trophy, and nothing new unlocks. The database still counts it towards 100% completion.
Tips
- Bring scuba gear. Either use a boat with a dive bag (the Bombora S23 CCS had one in two runs) or take the Scuba Gear pickup on a stilt-house jetty near the circle.
- Search the south-east of the circle, close to the seabed, for a small white boat on its side.
- The bag is at the stern. If a hatch is empty, try the next one along the back.
- Have the Arras Bullhead selected on the way down in case a shark turns up.
- Code 7700 opens Brian’s Lockup. Jason’s Notes show it at the keypad.
Related guides
- Previous: Don Gone (#23), clearing out Donnie’s trailer, open at the same time. Next: Recalibration (#25), Lucia’s plan to cheer Cal up. See all GTA 6 missions.
- Swamped (#22): the mission that opens this one
- Find the Lost Drugs (#17) and Clean Up After Donnie (#14): Donnie’s other lost packages, in the swamps
- Lab Fees: where you first get Brian’s Lockup and its code
- Island Dreams: Kenton’s dive trip, the first time you use scuba gear and the Arras Bullhead
- GTA 6 money guide: fences, stash bags and mailbox payouts
- Interactive map: Key Lento, Corsair Key and the stilt houses
Frequently Asked Questions
Where is Donnie's sunken boat in GTA 6?
On the seabed inside the pink search circle in the Atlantic, just off Corsair Key north-east of Key Lento, near the stilt houses. Head for the south-east part of the circle: Trophy Tom dived near the middle, swam south-east and had the wreck in sight within half a minute.
Where is the bag in Donnie's Lost Drugs?
In a storage compartment at the back of the wreck, not in the cabin. Swim round to the stern, wait for the Open prompt on the hatch and take the bag. A $1,200 counter appears in the top right once you have it.
Do you need scuba gear for Donnie's Lost Drugs?
You want it: the wreck sits deep enough that breath-hold diving is a struggle. Trophy Tom and GameRiot used a small boat with dive gear aboard, and iPodKingCarter found a Scuba Gear pickup on a cooler at a stilt-house dock about 440 feet from the search circle.
What is the code for Brian's Lockup?
7700. Brian gave it to you in Lab Fees, and Jason's Notes show it again when you stand at the keypad beside the Isla Tropical Private Club in Key Lento.
How much does Donnie's Lost Drugs pay?
$1,200. The strong box in Brian's Lockup offers Sell Stash Bag (+$1,200). Other lockup drops are paid after Brian collects them, into the mailbox at Jason's house, so the cash may not show up at once.
Is Donnie's Lost Drugs the same as Find the Lost Drugs?
No. Find the Lost Drugs (#17) is the swamp search for eight packages in four areas, and Clean Up After Donnie (#14) is the first beeping package near Hamlet. Donnie's Lost Drugs (#24) is a single dive to his sunken boat after Swamped.
Sources & Credits
Researched from these videos and official material, among others. Screenshots credit the creator whose footage they come from.
- GTA 6 - Donnie's Lost Drugs - Full Walkthrough · Trophy Tom
- GTA 6 Gameplay Walkthrough Part 9 - Recalibration, Don Gone & Donnie's Lost Drugs (PS5 Pro 4K) · GameRiot
- GTA 6 Mission #7 - Swamped & Donnie's Lost Drugs (Grand Theft Auto 6 Walkthrough) · iPodKingCarter
- HOW TO FIND DONNIE'S LOST DRUGS in GTA 6! (SUNKEN BOAT LOCATION) · SpaceQT
- GTA 6 - Swamped (Meet Brian) - Full Walkthrough · Trophy Tom
- Get RICH Early in GTA 6 With THESE INSANE Cash Spots + Powerful Guns · Millzaa