Progression Guide
WARDOGS Recon & Sniper Guide: How to Unlock SVD, Scopes, Ghillie & the Compound Bow
Want the SVD, a real sniper rifle, better scopes, the monocular, the rangefinder, the compound bow, or a ghillie suit? All of that sits on the Recon track. This is the spotting loop that levels it, what each tag actually pays, plus every major unlock.
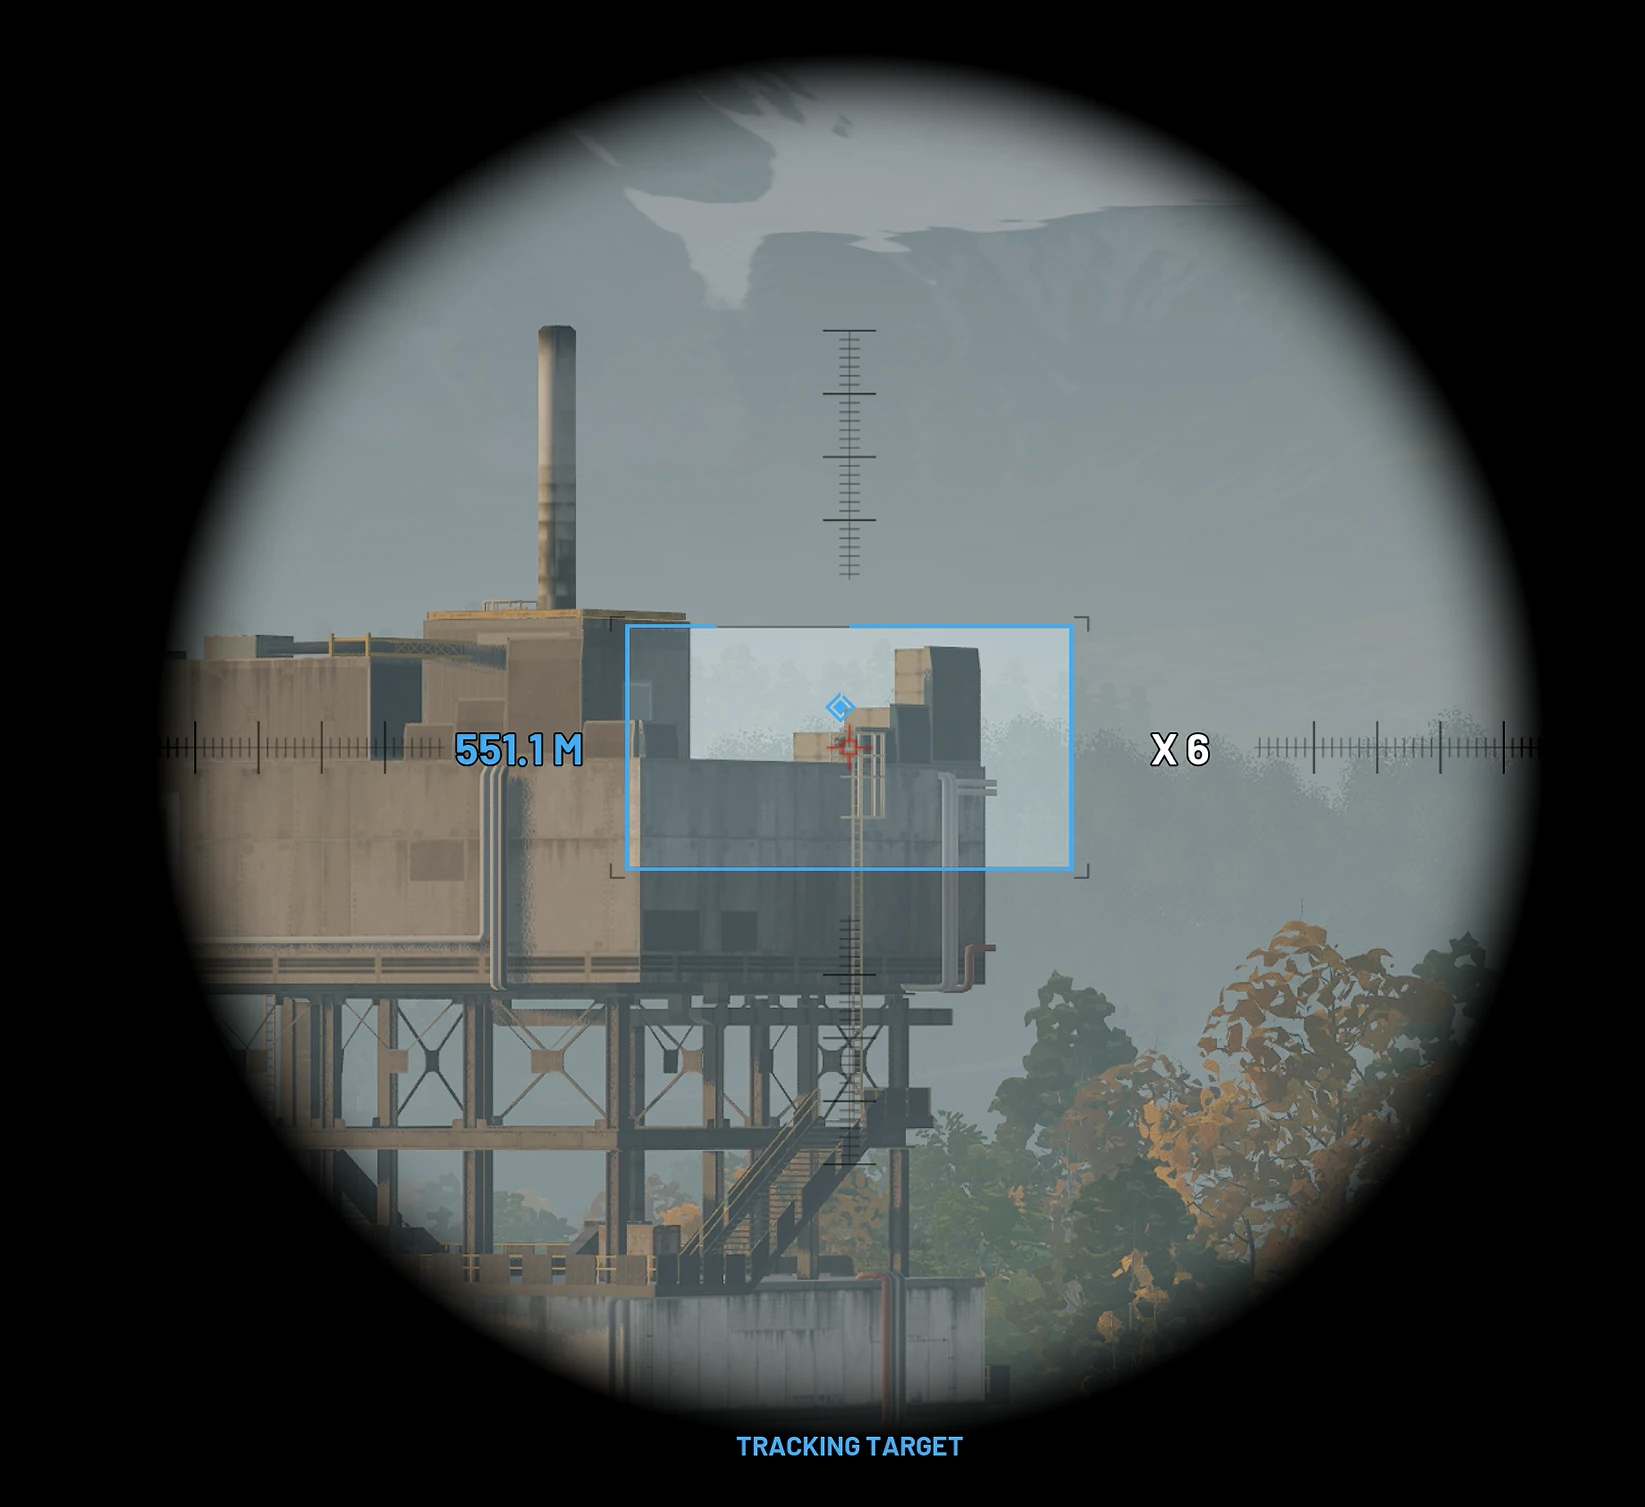
Quick Answer: How to Get the Sniper Rifle in WARDOGS
WARDOGS has no locked sniper class. At the vendor, click the Specialist slot (explosion / hammer / medkit icons), then Recon, buy Binoculars, ride a helicopter “taxi” to a rooftop, lie down with Ctrl, press 3, and hold your gaze on enemies. A first infantry tag pays $100 and 25 Recon XP; when they die you get another $400 and 150 XP. Then unlock the SKS at Recon 5, the Mosin at 10, and the SVD at 12.
Beta levels, Early Access on September 10
Unlock levels below are from the condensed closed-beta track. They will change when WARDOGS enters Early Access on September 10, 2026. The items, the spotting loop, and the mix-and-match loadout rules stay the same. Full table: Recon track unlocks.
Recon Is a Track, Not a Class
WARDOGS has six progression tracks — Assault, Medic, Recon, Support, Driver, and Pilot — but no locked classes. Recon is also the sniper track: it unlocks sniper rifles, marksman rifles, spotting tools, scopes, muzzle devices, sniper stands (bipods), the compound bow, claymores, and ghillie. Once an item is unlocked, anyone can buy it. Mix a recon optic with whatever primary you actually run.
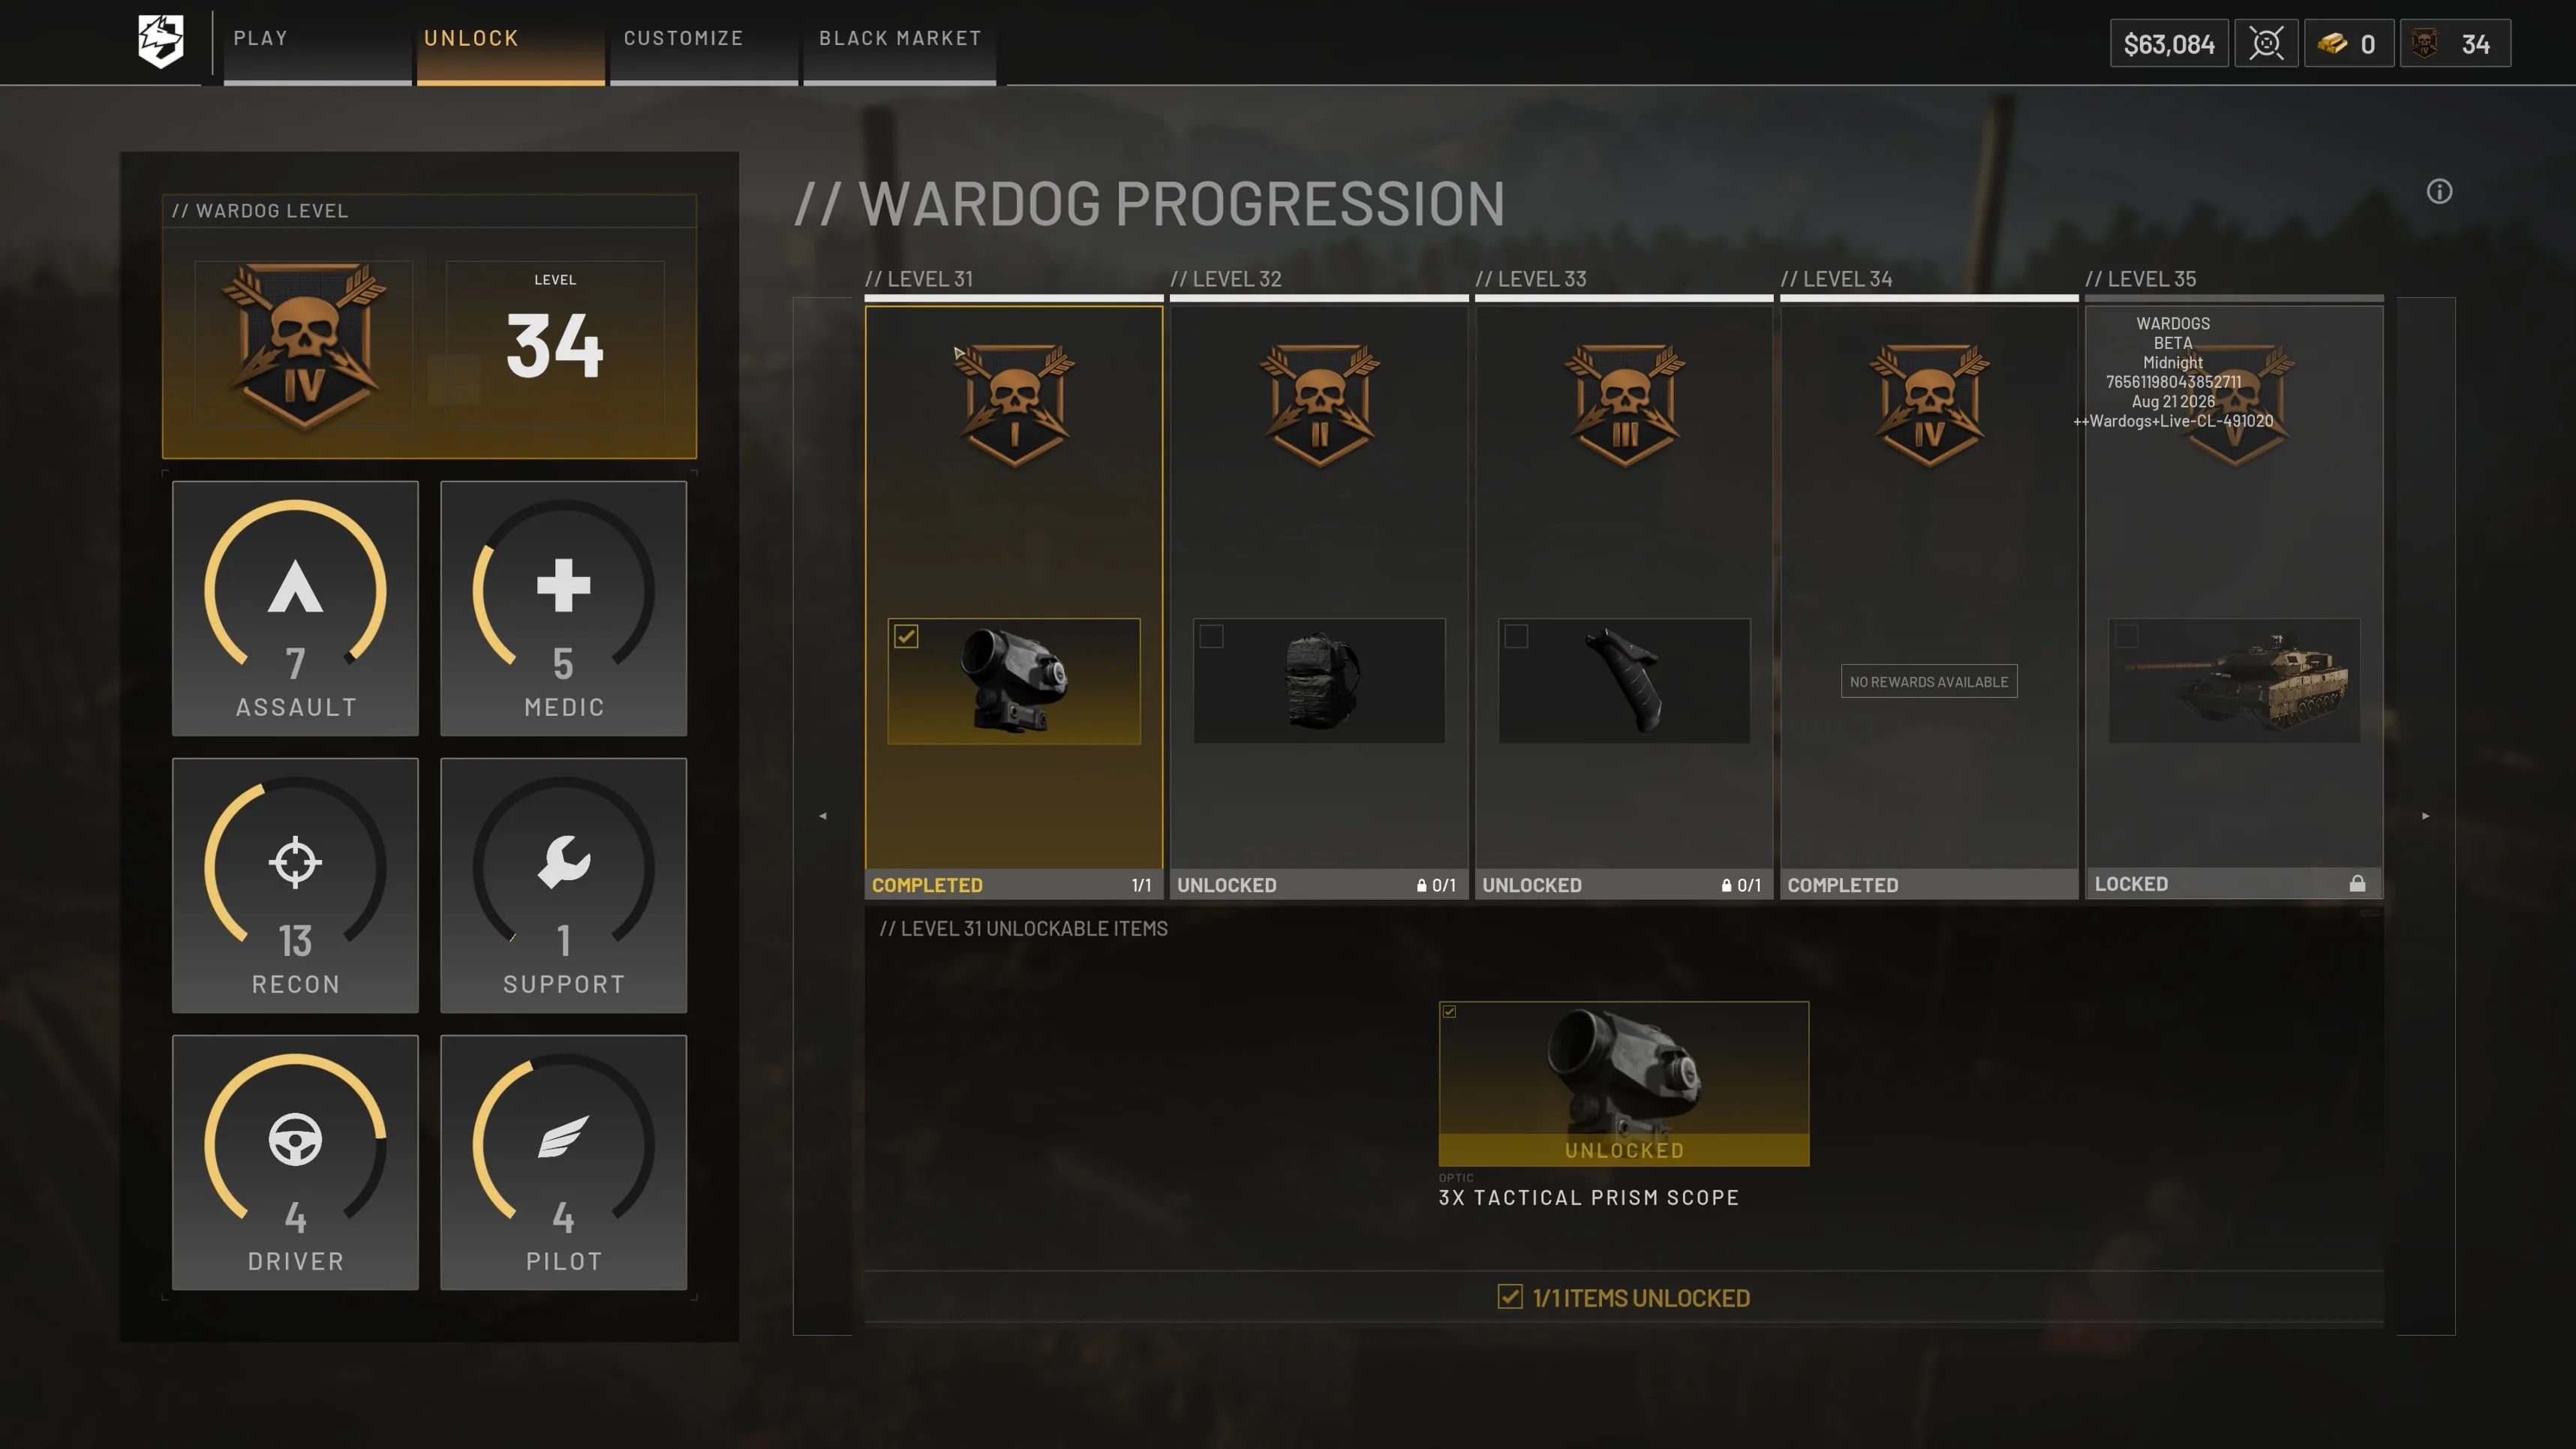
That is why you should not wait for a "good sniper" before you start Recon. The starter bolt gun reloads one round at a time and is not worth forcing. Take a free faction rifle, put binoculars in the specialist slot, and level the track by spotting. Even if you already bought a real sniper, hold fire until you have a cash buffer — the first shot is how you get sniped back. A recon-weapon kill is 250 Recon XP (350 at long range), but spotting is the reliable early method: you get paid on the tag and again when that target dies, across the whole team's kills. See what spotting pays and the money guide for the cash side.
How to Level Recon: The Spotting Loop
Spotting is the core of this track. You do not need a sniper kit. You barely need a kit at all.
1. Buy binoculars, a monocular, or a rangefinder
Open the item vendor. Click Equipment, then the Specialist slot — the one whose icon is three pictograms in a row (stylized explosion, hammer, medkit). That is what opens the specialist categories. Then click the Recon tab. You do not have to buy a primary or a backpack. The four spotting tools live here:
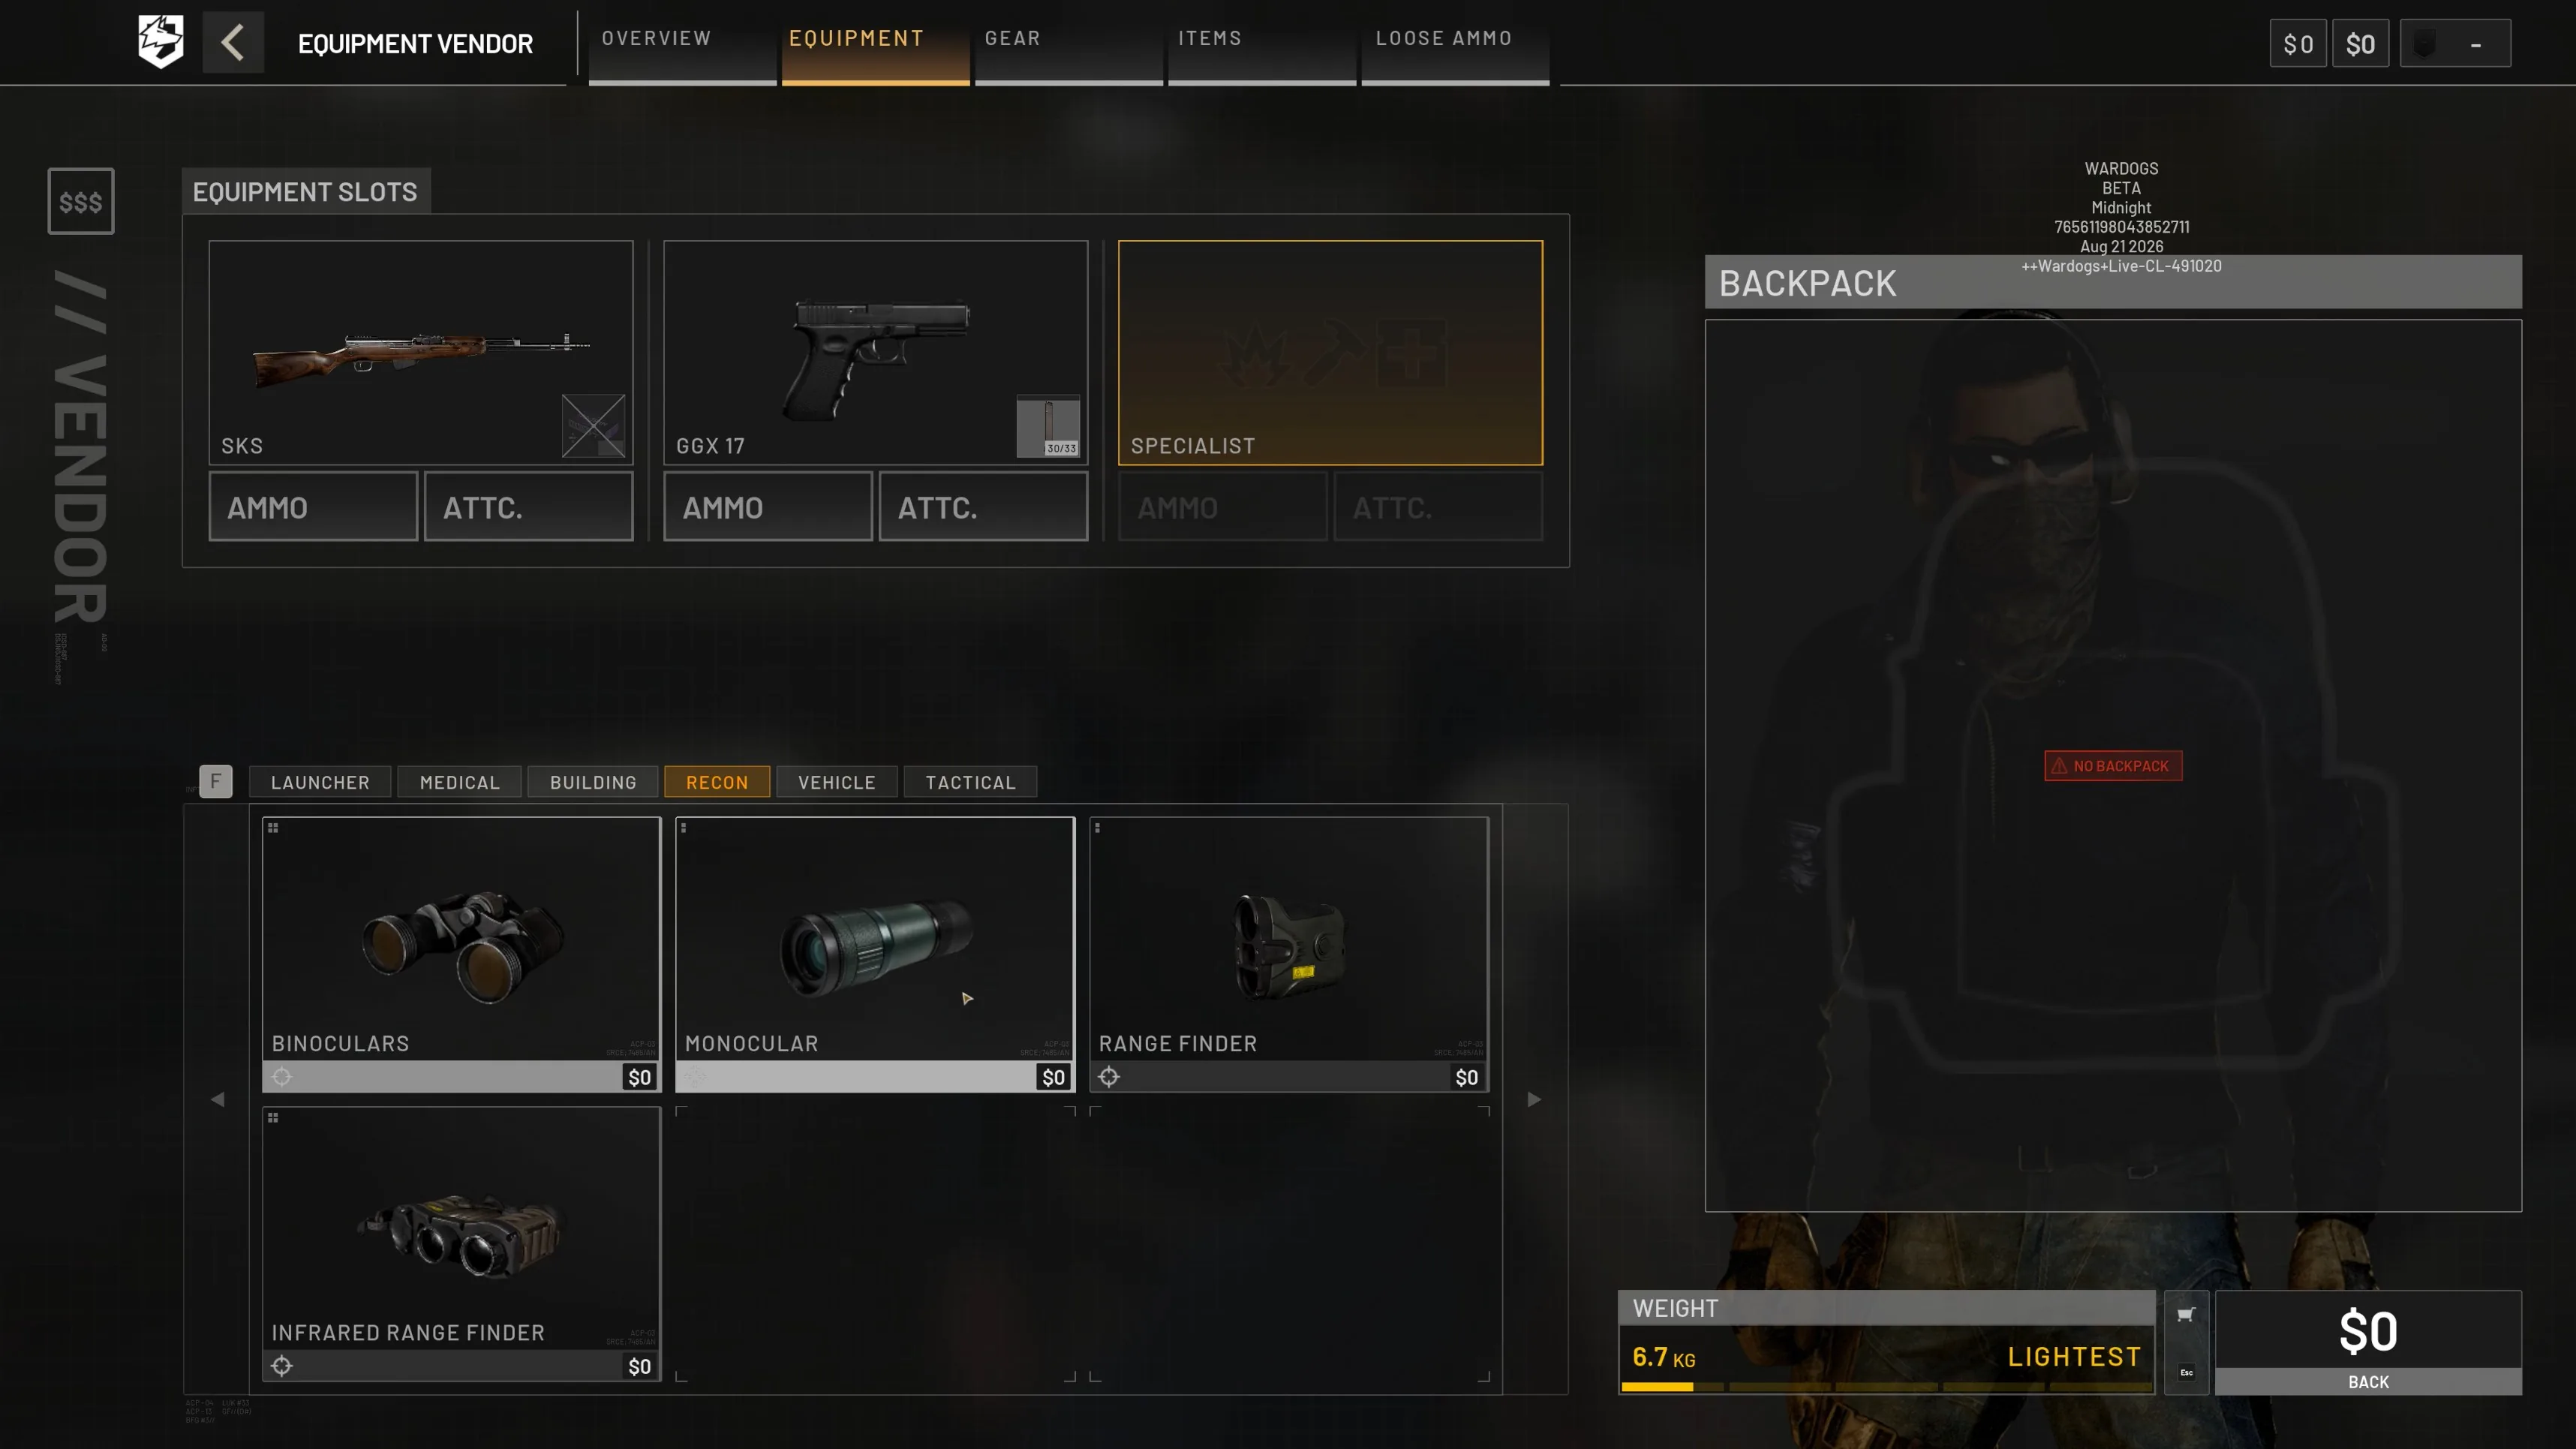
| Item | Unlock | Vendor | What you get |
|---|---|---|---|
| Binoculars | Start | $75 | Spot infantry & vehicles, low magnification |
| Monocular | Recon 2 | $150 | Medium variable zoom |
| Range Finder | Recon 8 | $400 | High zoom + exact distance |
| Infrared Range Finder | Recon 32 | $1,200 | Infrared + zoom + distance |
Unlocking the Monocular or Range Finder is a one-time cash toll on the progression screen. After that you buy the tool at the vendor price every match. Use whichever you currently have. Binoculars are enough to start. Until the next optic unlocks, stay on binoculars — then the monocular — rather than sitting out the ranks in between. Once the Range Finder is unlocked, spot with it if you also want to shoot — only the rangefinders print distance.
2. Take a cheap gun and a helicopter “taxi”
Grab one of the free starter rifles — one magazine, no backpack is fine. You can bring any weapon you like. You do not have to run the Scout Rifle TD, the cheap break-action sniper that reloads one bullet at a time. It is available from the start, and it is not good. Leave it until you have real rifles from the track, or until you loot a better one off a tower.
💡 Bandages: first spawn, skip them if you are broke and not buying a backpack. After that, buy the backpack, a few bandages, and drop the free Emergency Resuscitator (one is always $0 in the shop) into the bag. Spotting naked without bandages is a trap: you get clipped, someone picks you up, you are still one-shot, and you go down again. If you go down with the resuscitator in the pack, tell them to loot you first and use it on you. You can also revive someone yourself.
Then take the helicopter “taxi” — aka another player flying helis for logistics. Get in. (That loop is Pilot and Support progression; those guides come later. One pre-order perk is a Little Bird skin with yellow-and-black chessboard taxi lines, which is why the joke stuck.) Ride toward the Control Zone. You do not have to chase the inner hot zone, and you can spot from mountains outside the circle. You will tag far more people — and help your team score by existing in the zone — if you work inside the Control Zone. Zone presence is still a side benefit. Spotting is the job. If you want to pick the roof before you drop, scout it on the map first.
3. Roof, prone, press 3
Your primary objective is a drill tower or building roof as fast as possible. Towers are marked on the map. Crouch, then lie down with Ctrl. Press 3 for the specialist item slot and start scoping for the other team's players and vehicles. What the towers actually do in the round is in Drill Towers, Capture & the Hot Zone.
Don't shoot until you have a stack
Even if you already have a sniper on 1: consider not using it until you have made some money. The first shot is how you get found. Other snipers notice, and you get sniped back. Spotting pays without announcing the roof. Die broke with a bought rifle in the kit and you are rebuying it from an empty wallet. Bank a buffer from tags first, then take the shot when it is free — zero, then red-dot.
4. Rest the glass, then follow the gunfire
Your eyes are built to catch motion, not a still silhouette in a mess of leaves. Sweep a sector, then hold the optic still for a second and let your brain notice what moved. That pause is how you pick up players through trees and foliage you would pan right past. It gets better with time.
The same trick works on open ground. A prone enemy who blends into a distant ridgeline or hillside — someone you would pan straight past through a rifle scope — pops out when you scan the slope with a spotting optic first. Ping over where an enemy should be, get the visual feedback that confirms it, then swap to the rifle and take the shot. Keeping a sniper on your back while you scan the horizon with the rangefinder is one of the most overlooked opening moves on the class.
Then watch where the rounds are flying from and to. Tracers and impacts mark both ends of a fight. If your team is on the left, the people shooting at them are on the right — look there, tag them, and the direction is already done for you. That is good for your progression and for the squad: they are already shooting that way, so putting those enemies on the map is the handy part.
Finding Overwatch Spots on the Map
You do not have to guess which ridge or roof actually sees the zone. The interactive maps have two ways to pick a recon perch before you even spawn.
2D visibility footprint (live, still rough)
On the 2D map, open the viewshed tool (telescope button in the map toolbar, or add ?tool=viewshed to the URL). Click any point — a drill-tower roof, a mountain bench, a treeline outside the circle. The overlay paints a visibility footprint: green is ground you can see from that observer, with a ~4 km cap and a 1.8 m eye height (prone-friendly).
- Ozeti viewshed — click a roof or ridge, see what that spot covers.
- Bakurani viewshed — same tool on the highland map.
⚠️ Work in progress: the footprint is still janky. It ray-marches terrain only, so buildings, trees, and FOBs are invisible to it. Use it to compare ridgelines and dead ground, not as a promise that a city block is clear.
3D fly-around (almost ready)
A 3D version of the same maps is nearly done. You will be able to fly the camera around the zone and judge recon spots by eye: which rooftops see the Control Zone, which mountain benches are masked by a fold in the ground, which tower is actually the one to land on. When it ships it lives on those same map pages. Until then, the 2D viewshed is the tool — pair it with a helicopter “taxi” and a roof.
Drill Towers, Capture & the Hot Zone
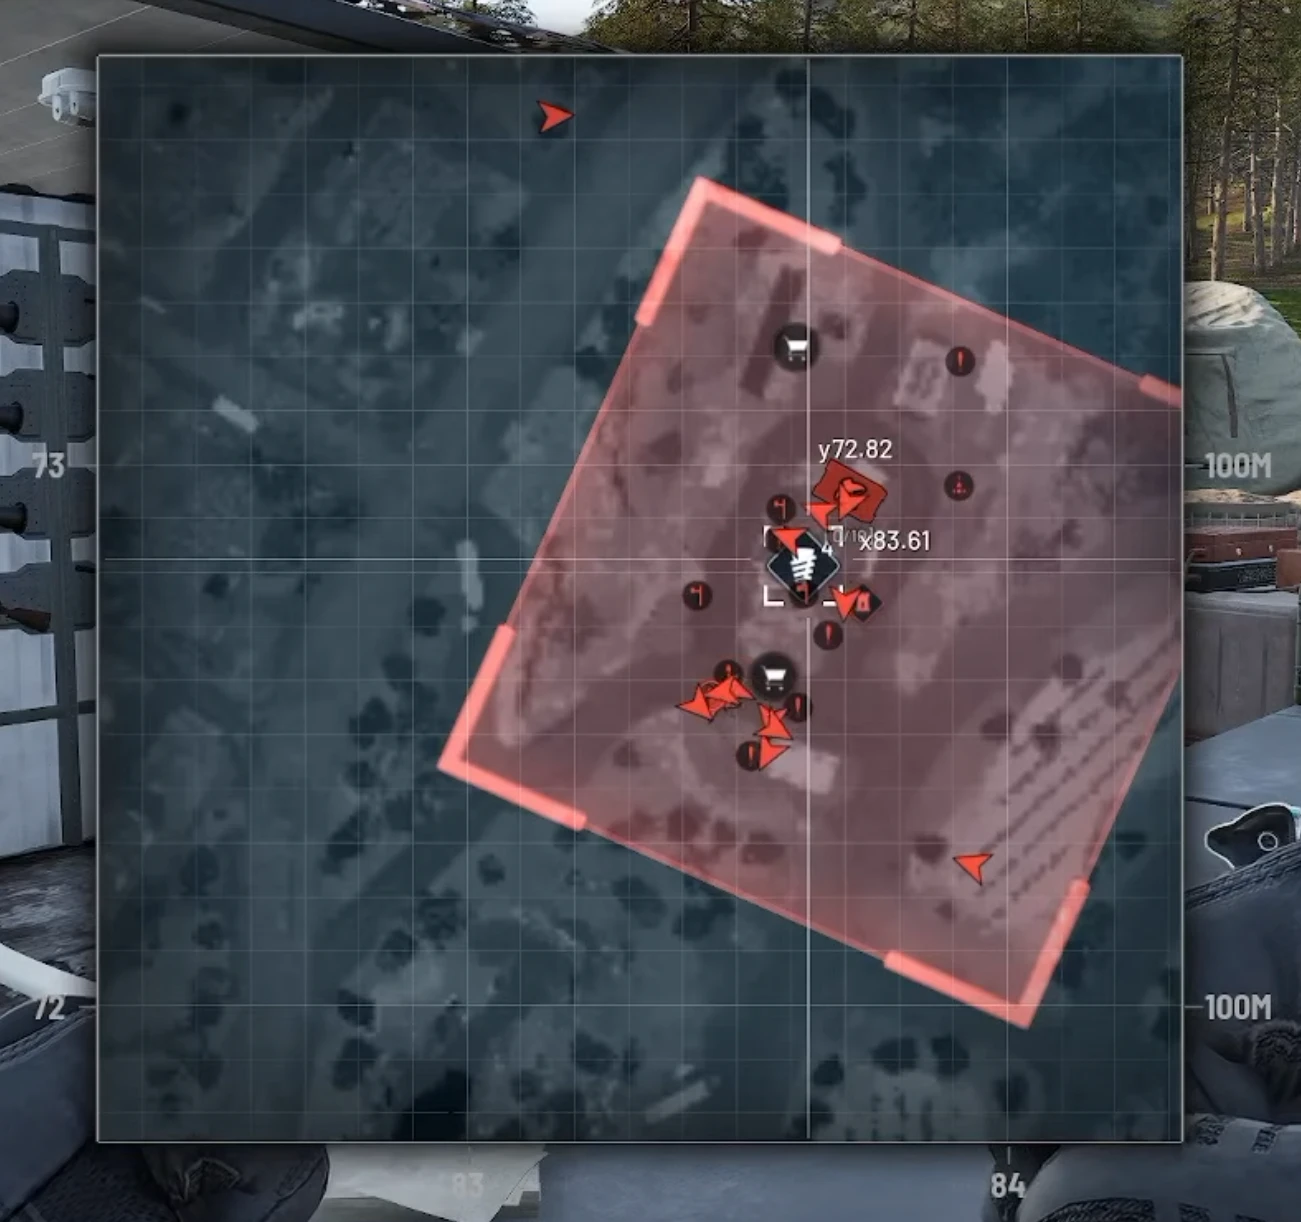
Drill towers are one of the main attractions on the map. Squads usually plant FOBs around them. They are the same pins as in the screenshot above, and they are on the interactive maps.
Once a tower unlocks during the match, capture it by interacting with the computer console on the third floor. If your team holds enough towers, the hot zone — the small circle inside the big Control Zone — slides toward you. Anyone standing in that inner circle counts as two people on the score ticker that awards a point every couple of seconds. That is why a tower is more than a sniper nest: it can pull the fight onto your roof.
The roof is also where better sniper rifles sometimes spawn. Beat other players up the ladder and you can skip the Scout Rifle entirely.
How Tagging Works on the Mini-Map
Hold your gaze through the binoculars, monocular, or rangefinder on an enemy for about one to two seconds. That tags them.
- Recon players using spotting gear can keep seeing tagged infantry through leaves and cover. Finding them in the first place is the pause in step 4.
- Everyone else on your team gets moving highlights on the mini-map.
- You earn cash and Recon XP on the tag itself, then a larger payout when a target you found is killed or destroyed.
The tag icon has two layers:
- Fresh tag (inner fill + outer timer): a team-colored icon appears, and the outer rotated square starts ticking down. While that inner fill is present, the target stays on your team's map even as they move. When the outer timer hits zero, they vanish from the map.
- Recon-only (outer square, no inner fill): you can still see them through your optic, but regular teammates cannot see them on the map. Hold gaze again to restore the inner fill and put them back on the mini-map. No middle section means the map does not show them.
You can tag more than infantry. Mark FOBs, spawn vehicles, supply drops, cars, helicopters, and tanks and they show on the map too. Keep your eyes on the sky: pinging each helicopter as it comes in and drops a fresh wave of players is some of the freest XP on the map. Whenever any of those are killed or destroyed, you get XP and cash for the assist — even if another team gets the kill, a helicopter crashes itself, or a player forgets to open their parachute. Assists still pay. The exact numbers are in What Spotting Pays.
⚠️ FOBs look back: a FOB is worth tagging, but if you have a clean line of sight to one, a sniper posted in its tower usually has the same line back to you. Expect incoming fire when you line one up, and tag it from cover rather than skylining yourself on the edge of a roof.
💡 Stay alive, keep scanning: a good roof that you do not die on is worth more than a few sniper kills. Ten infantry tags that later die are 1,750 Recon XP without you firing a shot. Pair it with a rifle later; do not start there.
What Spotting Pays (XP & Cash)
These are the cooked closed-beta values from the Aug-21 datamine. Early Access on September 10, 2026 can retune them. They are the base payouts for a hostile target; friendly tags pay nothing, and re-tagging the same victim pays less.
You get paid twice: a small amount when the tag lands, then a larger Spotted Kill Assist when that target is killed or destroyed.
When the tag lands
| Target | Cash | Recon XP | Refresh |
|---|---|---|---|
| Infantry | $100 | 25 | $50 / 12.5 XP |
| FOB | $500 | 50 | $250 / 25 XP |
| Spawn vehicle | $1,000 | 100 | $500 / 50 XP |
| Little Bird | $250 | 25 | $125 / 12.5 XP |
| Huey | $500 | 50 | $250 / 25 XP |
| Havoc / heavy tank / AA tank | $750 | 75 | $375 / 37.5 XP |
| Artillery tank | $1,500 | 75 | $750 / 37.5 XP |
| Supply crate / drop | $50 | 15 | $25 / 7.5 XP |
When a tagged target is destroyed
This is the HUD line Spotted Kill Assist. It pays even if another team gets the kill, a helicopter crashes, or someone misses their chute.
| Target | Cash | Recon XP |
|---|---|---|
| Infantry | $400 | 150 |
| FOB | $2,000 | 250 |
| Spawn vehicle | $4,000 | 500 |
| Little Bird | $1,000 | 75 |
| Huey | $1,400 | 125 |
| Havoc | $5,000 | 250 |
| Heavy / AA tank | $5,000 | 375 |
| Artillery tank | $8,000 | 375 |
| Supply crate / drop | $200 | 75 |
So one infantry you tag who later dies is $500 and 175 Recon XP. Mark a spawn vehicle that gets wrecked and that single assist is $5,000 and 600 XP. Scan everything that moves, not just people.
Spotting vs sniping for XP
A kill with a recon weapon (SKS, Mosin, SVD, and the other snipers/DMRs) is 250 Recon XP, 275 on a headshot, and 350 for a long-distance kill. Kill cash starts at a $300 base and scales with range: 1× under 300 m, 1.5× at 300 m, 2× at 400 m, up to 4× at 900 m.
That is why spotting still wins before you have a real rifle. One long-range sniper kill is 350 XP. Ten tagged infantry who die are 1,750 XP, plus the cash, plus whatever vehicles you marked. Take the shots when they are free; do not make the rifle the job until the track has given you one.
How to Get a Sniper Rifle in WARDOGS
There is no single "the sniper rifle." The track hands them out in this order (beta levels):
| Rifle | Recon | Unlock | Buy | Notes |
|---|---|---|---|---|
| Scout Rifle TD | Start | Free | $1,100 | Break-action, one round at a time. Skip it. |
| SKS | 5 | $25,000 | $2,400 | First real marksman rifle. Semi-auto 7.62×39. |
| Mosin Nagant | 10 | $50,000 | $4,500 | Bolt-action 7.62×54. Cheap long-range. |
| SVD | 12 | $50,000 | $4,800 | Semi-auto 7.62×54. The usual "how do I unlock SVD" answer. |
| SV98 | 19 | $100,000 | $5,200 | Magazine-fed bolt gun. |
| MK22 | 25 | $150,000 | $6,400 | .308 precision rifle. |
| BMR-308 | 30 | $125,000 | $6,000 | Semi-auto .308 bullpup. |
| AMR 50 | 35 | $200,000 | $8,800 | .50 anti-materiel. Vehicles and armor. |
Field drop: better snipers sometimes spawn on drill tower roofs. If you beat other players up the ladder, you can skip the Scout Rifle entirely and start shooting with something that actually feeds a magazine.
Sniper kills do feed the Recon track — 250 XP, or 350 at long range. Early on, when you only have the Scout Rifle or no rifle skill yet, spot first. Ten tagged infantry who die outpace a handful of shots. You will hit SKS / Mosin / SVD faster, and you will bank cash for the unlock tolls. Full table: What Spotting Pays.
Running the SKS: Your First Real Rifle
Recon 5 is where the track stops feeling like a grind. The SKS will one-shot an unarmored enemy and two-shot an armored one, with a shot at a one-shot headshot depending on how much durability is left in their helmet. Unlike the Scout Rifle's slow single-shot break action — four or five seconds between rounds — it is a semi-auto: two or three shots downrange in a second or two, so you close out the kill before the target reacts, especially against someone prone in a bush who is slow to notice the first hit.
The semi-auto also means you are not stuck at range. If a fight overruns your tower and enemies spawn on top of you, pull the 6x scope off into your inventory and the SKS becomes a 10-round close-quarters rifle — enough to rack up a double or triple before you run dry. Same gun, from a ridgeline to a stairwell.
💡 Starter SKS loadout (~$6,500)
SKS, 60–100 rounds, the cheap 6x Precision Rifle Scope, helmet, armor vest, backpack, a monocular or Range Finder, ten heals, and a resuscitator. Skip the sidearm to save cash if you are still playing spotter-first. Pricier than the binoculars-only kit, but about three kills or a little spotting makes it all back — and it lets you keep tagging while you also hold a shooting position. Still bank a buffer before you fire: die broke with a bought rifle and you are rebuying it from an empty wallet.
How to Unlock the SVD in WARDOGS
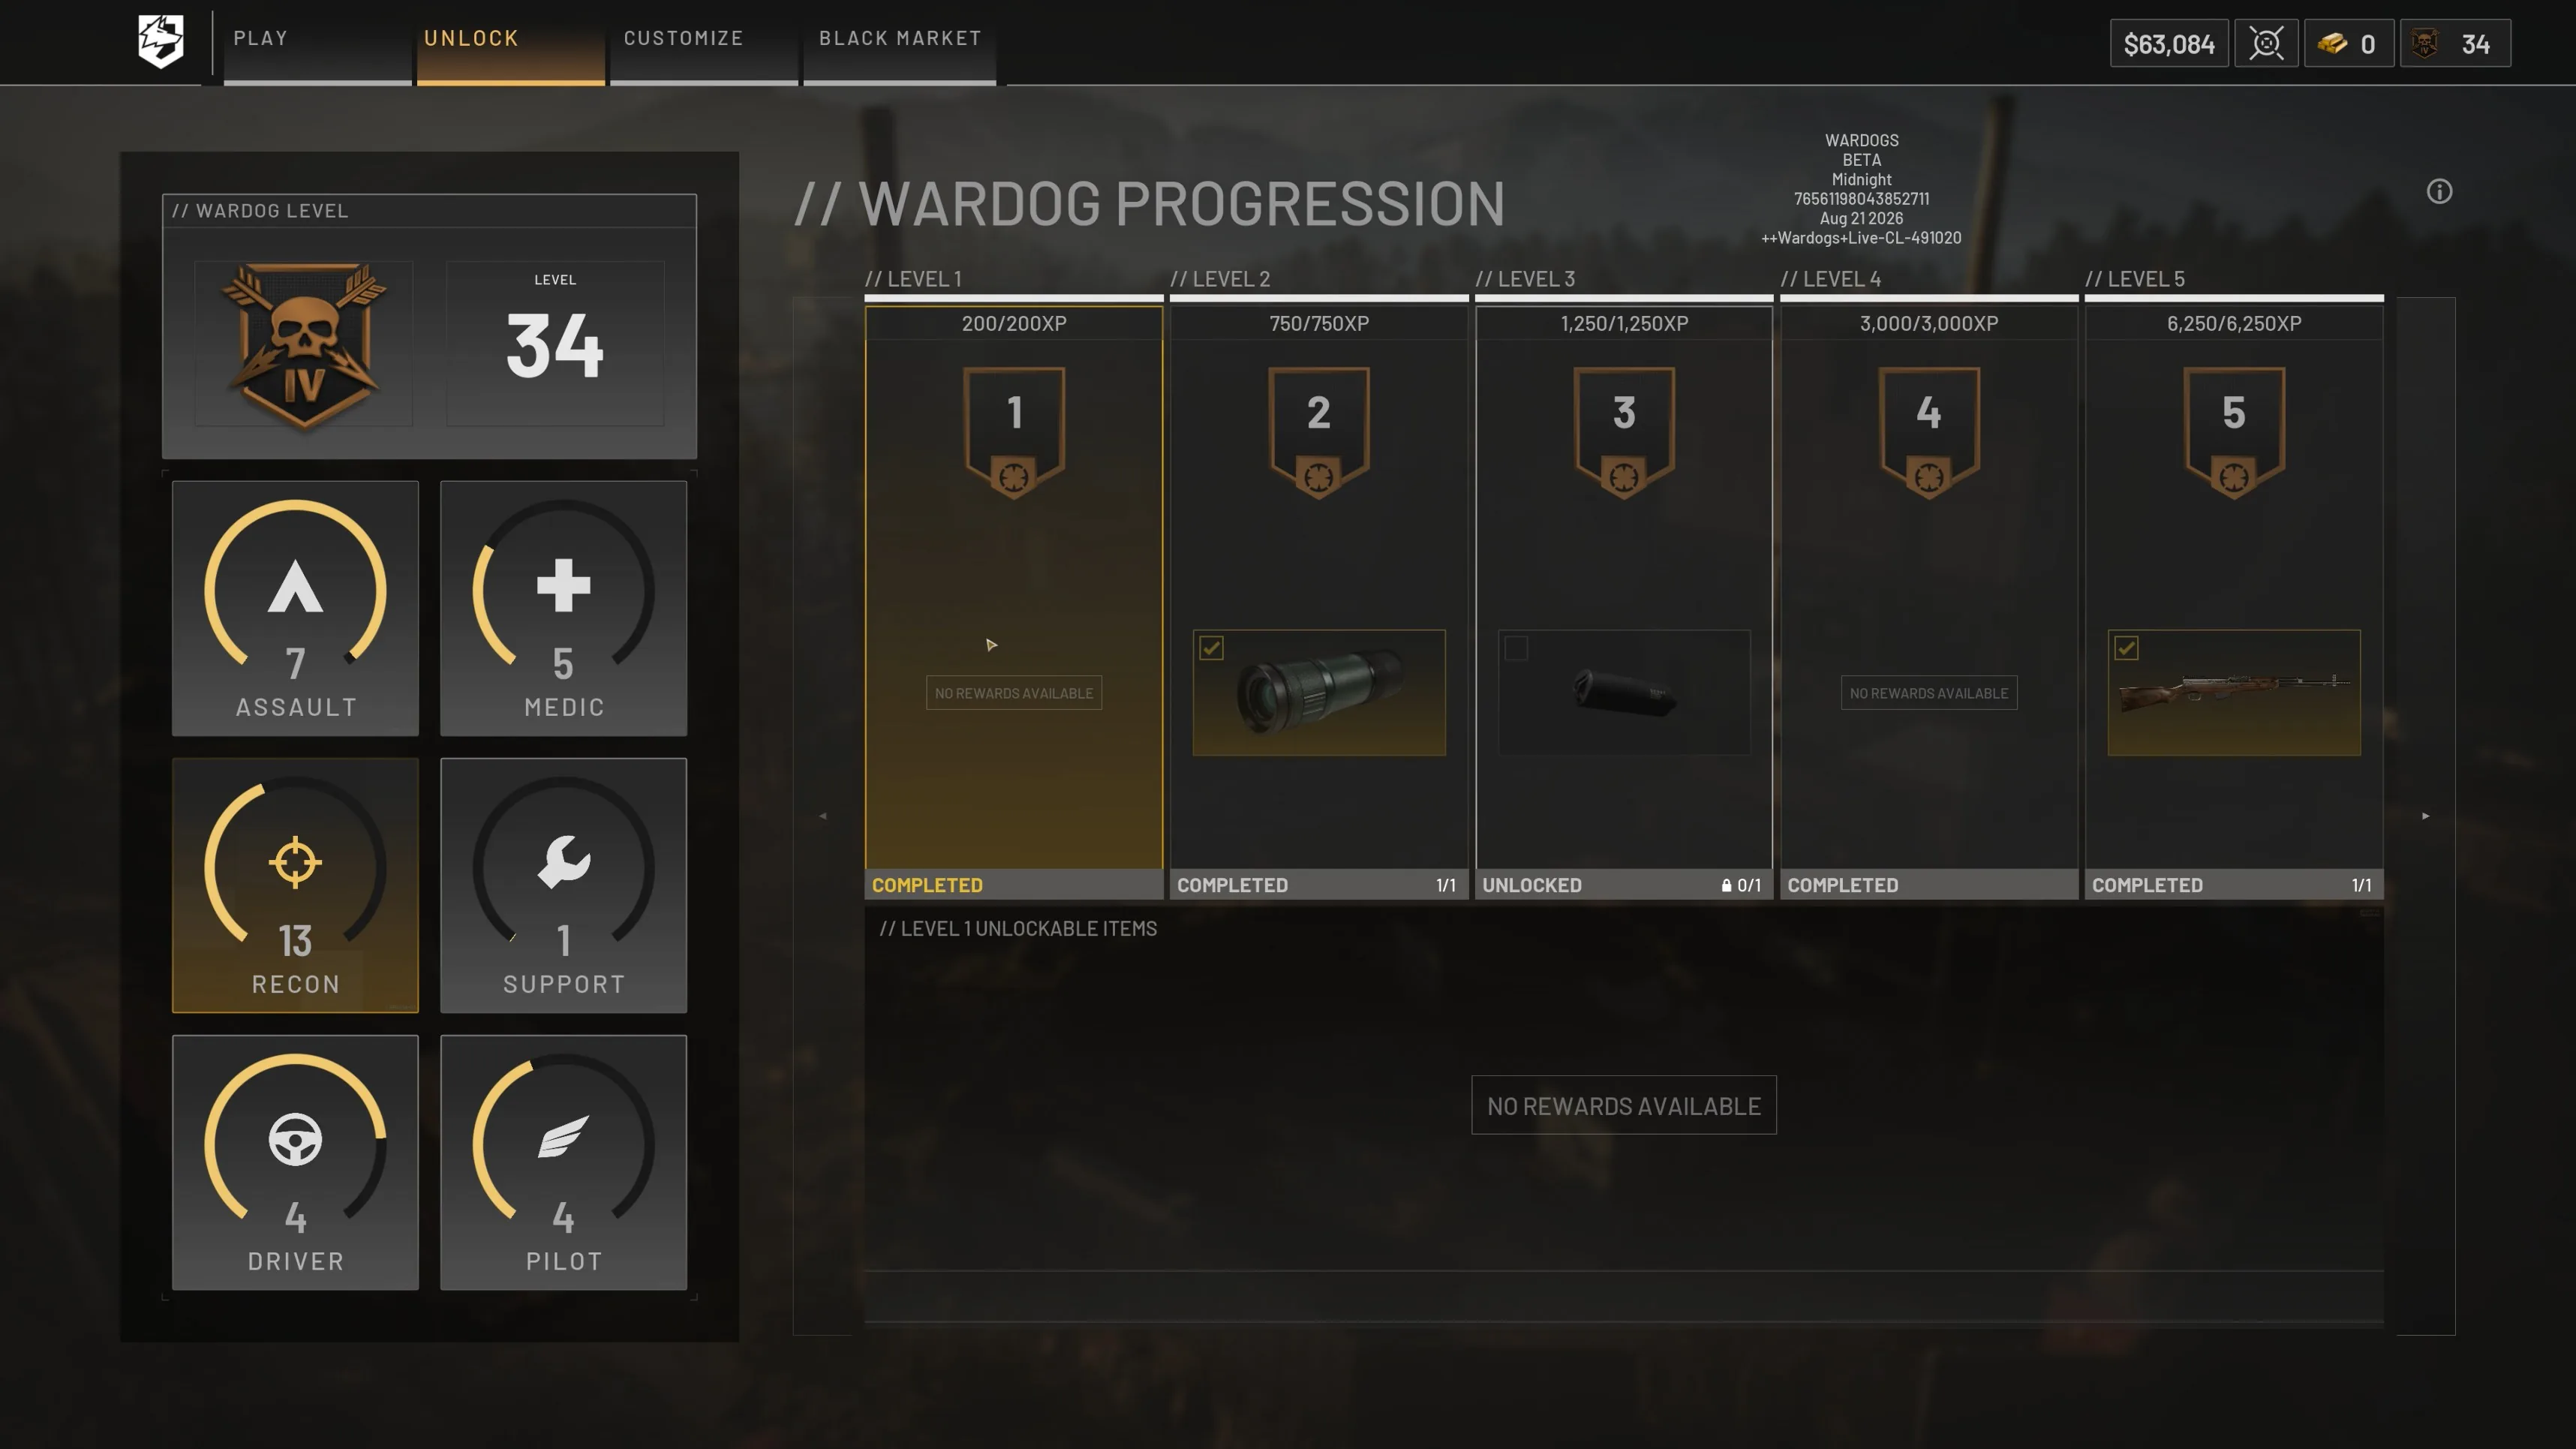
- Level Recon to 12 by spotting (and any DMR / sniper kills you pick up along the way).
- Open Unlock → Recon and pay the $50,000 unlock.
- Buy the SVD at the vendor for $4,800. The 5-round mag unlocks with the rifle; a 10-round mag comes at Recon 16.
The SVD is a semi-auto 7.62×54 marksman rifle, not a slow bolt gun. If you want a bolt-action before that, the Mosin at Recon 10 is the first serious one. After the SVD, the SV98, MK22, and AMR 50 are the dedicated snipers.
Monocular, Rangefinder & Scope Guide
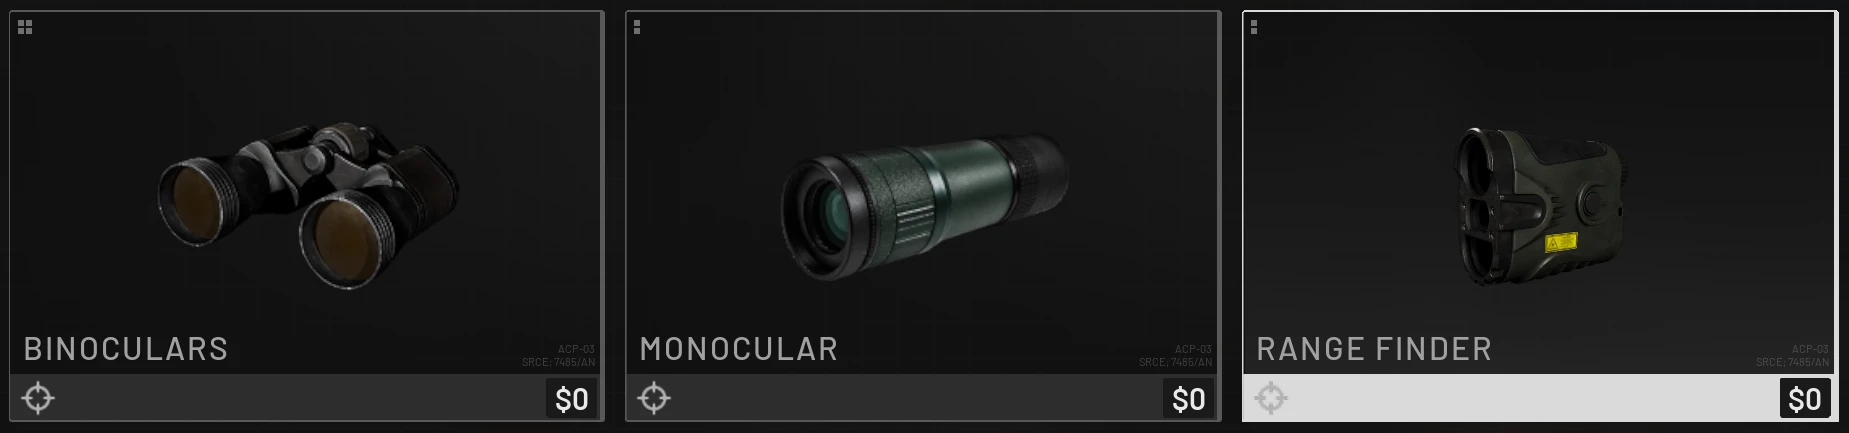
How to get the monocular
Recon level 2, $7,500 unlock, $150 at the vendor. Specialist → Recon. Medium variable magnification. Until you hit 2, just run Binoculars. This is the first upgrade over them, and the tool most people should live on until the Range Finder.
How to get the rangefinder
The Range Finder is Recon 8, $15,000 unlock, $400 to buy. High zoom plus an exact distance readout. Until then, keep the previous tier: binoculars, then the monocular. Binoculars and the monocular do not show meters — only the Range Finder and the Infrared Range Finder do. That number is what you hold in your head when you swap to the rifle. The Infrared Range Finder is the late-game version at Recon 32 ($50,000 unlock, $1,200 to buy): infrared display, variable zoom, and distance. Same rule: stay on the Range Finder until 32. Ghillie hides you from that IR view, which is why the suit matters later.
How to get better scopes
Rifle optics also sit on Recon. They are weapon attachments, not the specialist slot:
| Scope | Recon | Unlock |
|---|---|---|
| 6x Precision Rifle Scope | Start | $680 |
| 3x-6x LPVO Short Dot | 11 | $15,000 |
| 6-10x Scope MRAD | 18 | $25,000 |
| 6-10x Scope MOA | 26 | $30,000 |
| 6x Marksman Scope + Reflex | 34 | $35,000 |
| Frontier 2.5x-10x Precision Scope | 43 | $95,000 |
Most of the early track you will be on that cheap 6x. Practice it. The 3x-6x and 6-10x come later. Drop changes with every rifle, and each scope's reticle UI is different. You do not have to memorize every hash though: Page Up / Page Down zeros the optic to the rangefinder number, then you put the red dot on them. Still worth reps on the glass for the leftover 50 m between ticks.
How to Practice Sniping at the Firing Range
You do not need the Recon unlock to learn a rifle's drop. The front-end Firing Range has the same vendors as a match spawn, except everything is $0 — including guns you have not unlocked yet. Buy them the usual way. Turn right from spawn; the vendors and the moving target sit that way.
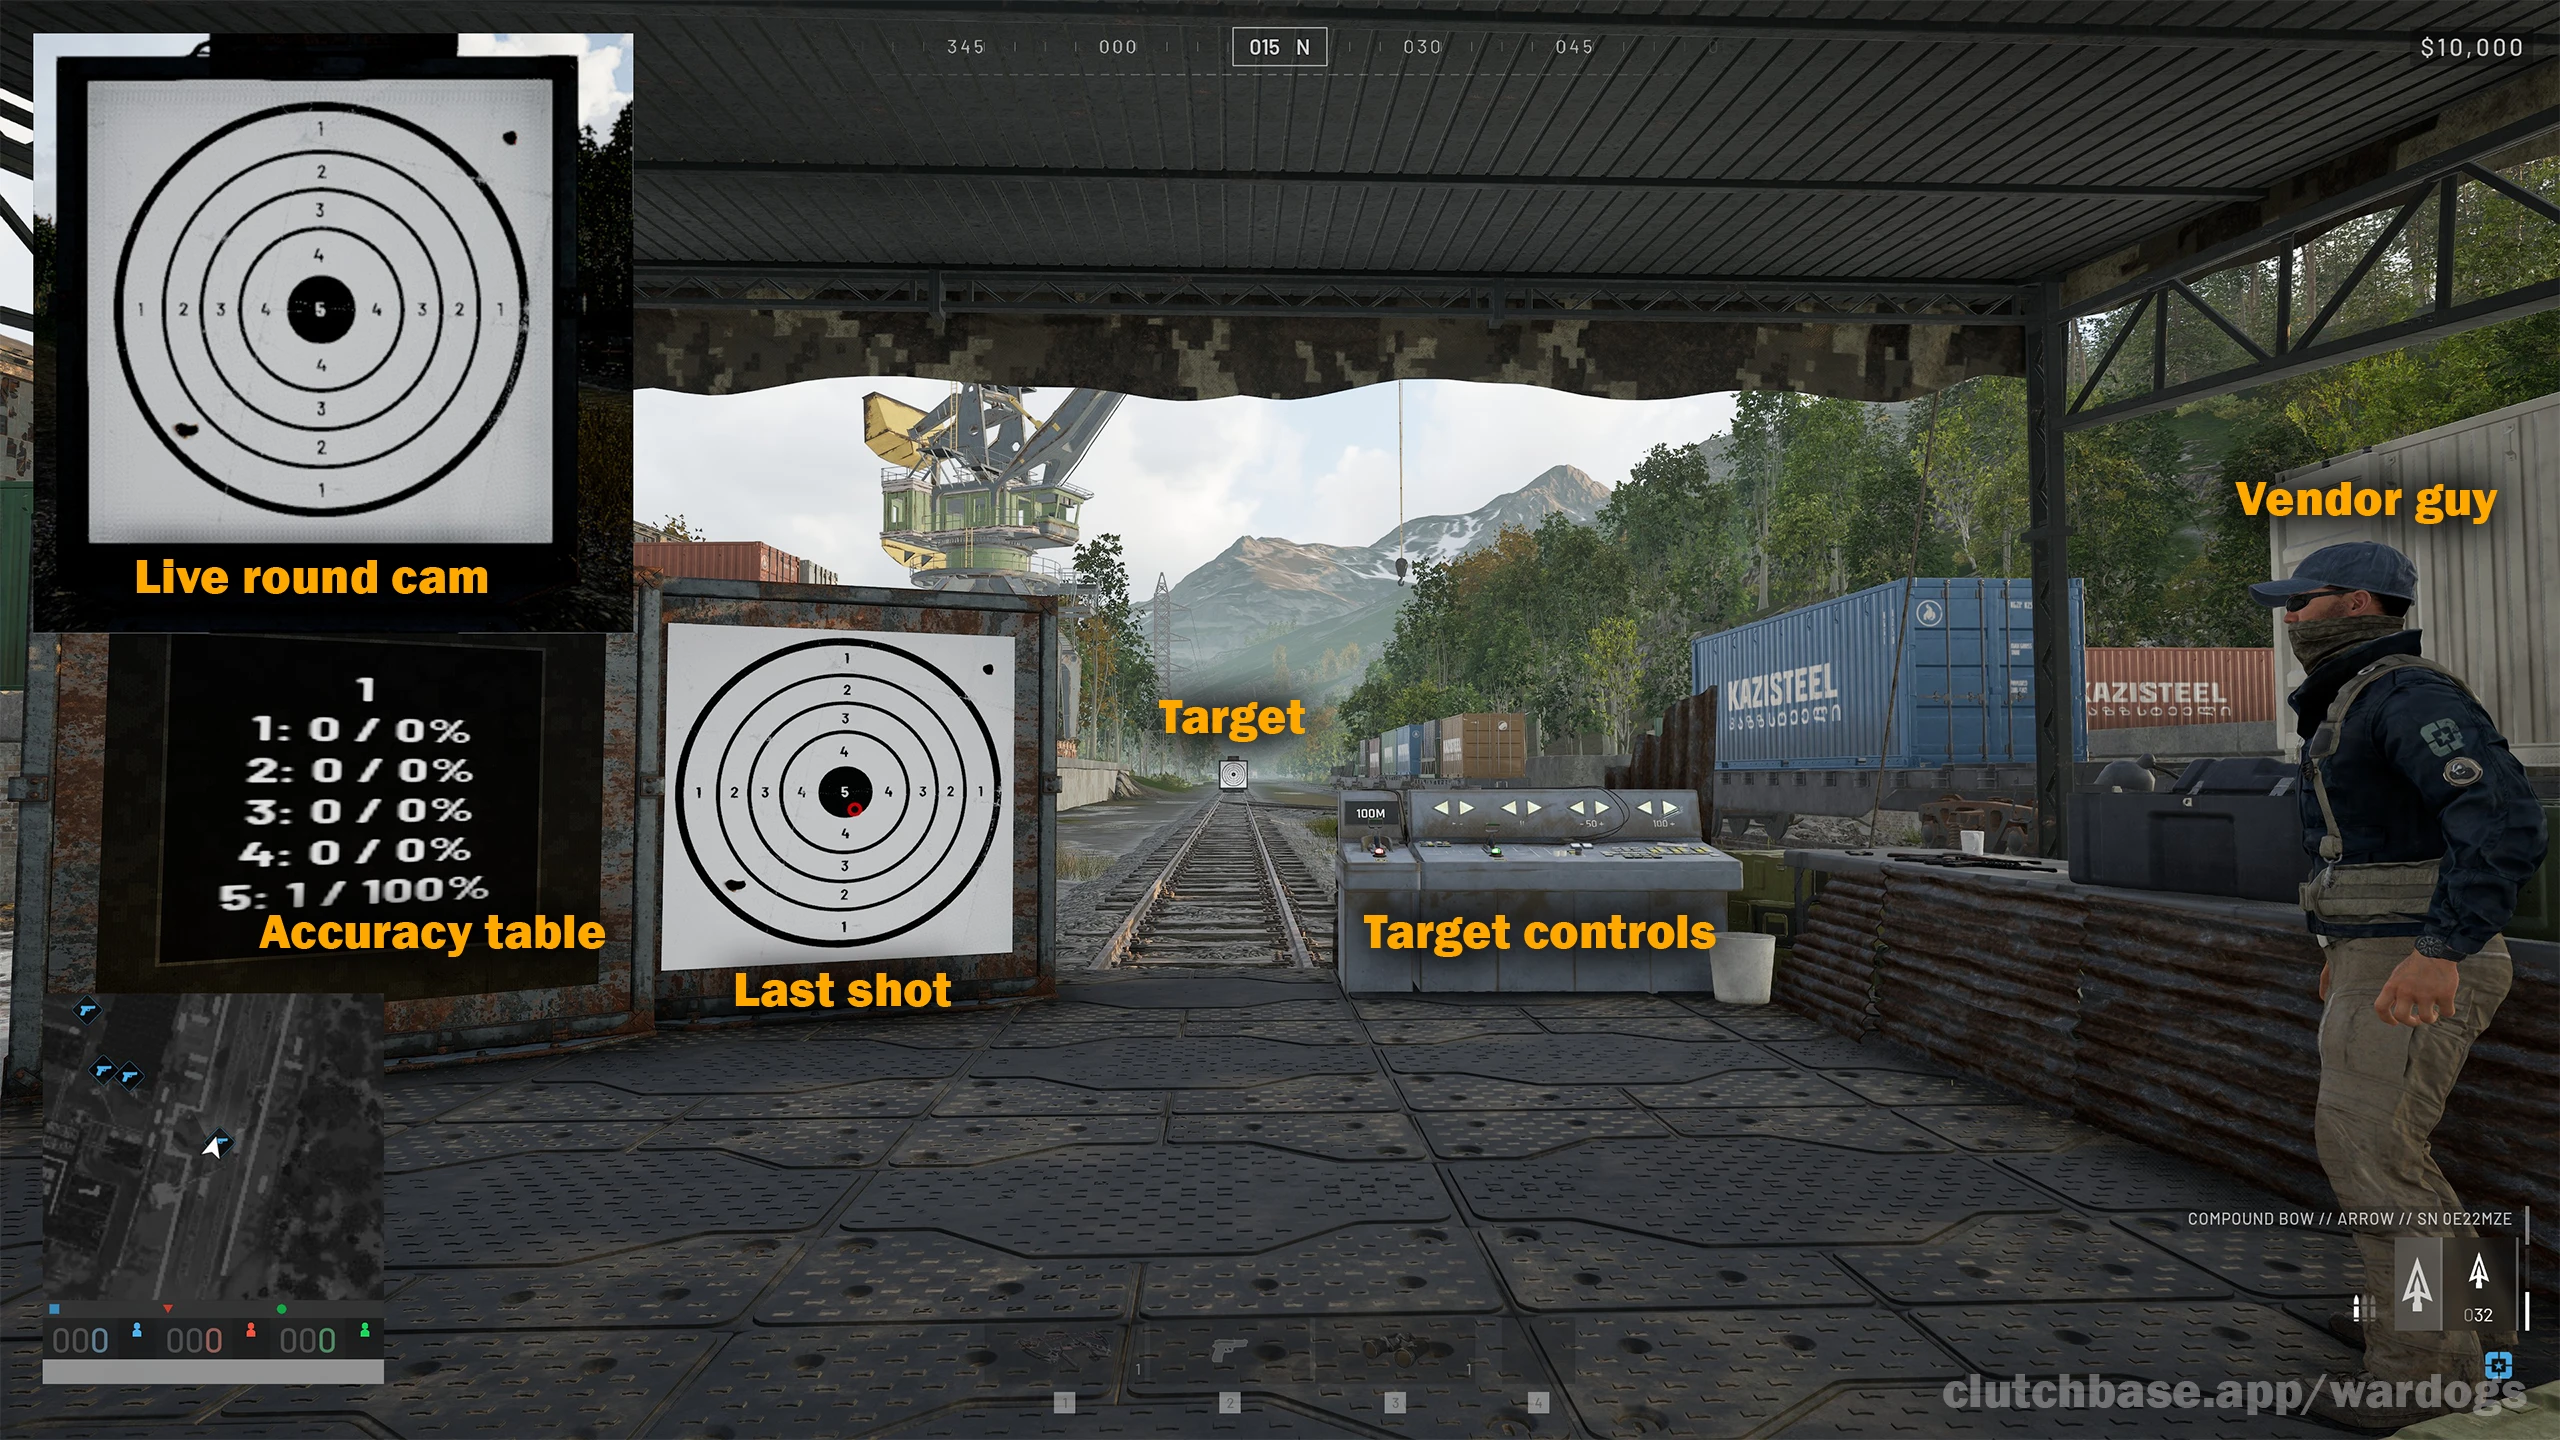
- From the main menu, enter the Firing Range.
- Turn right. Vendors and the rail target are there.
- Buy the sniper you want to learn (SVD, Mosin, SV98, MK22, AMR 50 — no unlock gate, $0) and a sidearm. Any pistol. The target's move buttons are awkward with a rifle; a pistol is the right tool for that.
- Mount the 6x Precision Rifle Scope unless you already live on something else. That cheap 6x is what you will run until the 3x-6x and 6-10x unlock. Drop changes with the rifle, and each scope's reticle UI is different, so train the glass you will actually use.
- Buy extra rounds. Some snipers load rounds straight into the rifle; some use magazines. Full loop: how to reload in WARDOGS. Short version: one magazine in the rifle, one spare in the backpack, then loose ammo from the Items tab to refill emptied mags in inventory.
- The adjustable target on rails is next to the vendor on the right. Shoot the buttons to send it out and back. Press F on the second lever for an always-on bullet cam in the top-left of the screen.
We already publish the numbers on the sniper calculator — drop in meters and mils, time of flight, remaining velocity, from the beta ballistics data. A visual holdover overlay on the real reticles is coming on that same page. Day to day you will mostly zero the scope instead of holding hashes; the calculator is for the leftover, or for learning why the round lands where it does.
Zero the scope with Page Up / Page Down
A commenter called this out, and it checks on the Firing Range: you do not have to remember the falloff for every distance. While scoped, Page Up and Page Down walk the zero in 100 m steps. The current zero distance shows on the glass.
Range them, set the zero to that number (or the nearest hundred), then put the red dot on them. Exact match: send it. Between ticks, pick the closer hundred and hold a hair. A 450 m target with a 400 m zero needed a hold so small it was not even the next notch.
In a match: rangefinder on 3, rifle on 1, then zero
Unlock the Range Finder at Recon 8 and spot with it, not the binoculars, once you have it. You are already scanning for tags; the rangefinder prints the distance on every look. Binoculars and the monocular will not.
When you pick up a stationary target you actually want to kill:
- Read the distance on the rangefinder. Remember it.
- Press 1 for the sniper (primary) and 3 for the rangefinder (specialist). That is the whole swap. A sniper will not go in slot 2 (sidearm) or slot 3 (specialist-only). A rangefinder will not go anywhere except 3. Early backpacks cannot stash long guns anyway — buying the rifle at the vendor puts it in the primary slot.
- ADS, then Page Up / Page Down until the zero matches that distance (100 m steps; the number is on the glass). Red dot if it is exact. A little high or low if they sit between hundreds — at 450 m vs a 400 m zero, that leftover was not even the next notch. The sniper calculator is there if you want the mils anyway.
Keep spotting as the default — and if you are still broke, do not take the shot yet. The first round is how you get sniped back. Bank tags first. Then the shot is the extra when someone sits still at a range you already know. Primary sniper on 1, rangefinder on 3: intel and XP on the scan, then one adjusted shot when it is free.
How to Get the Compound Bow in WARDOGS
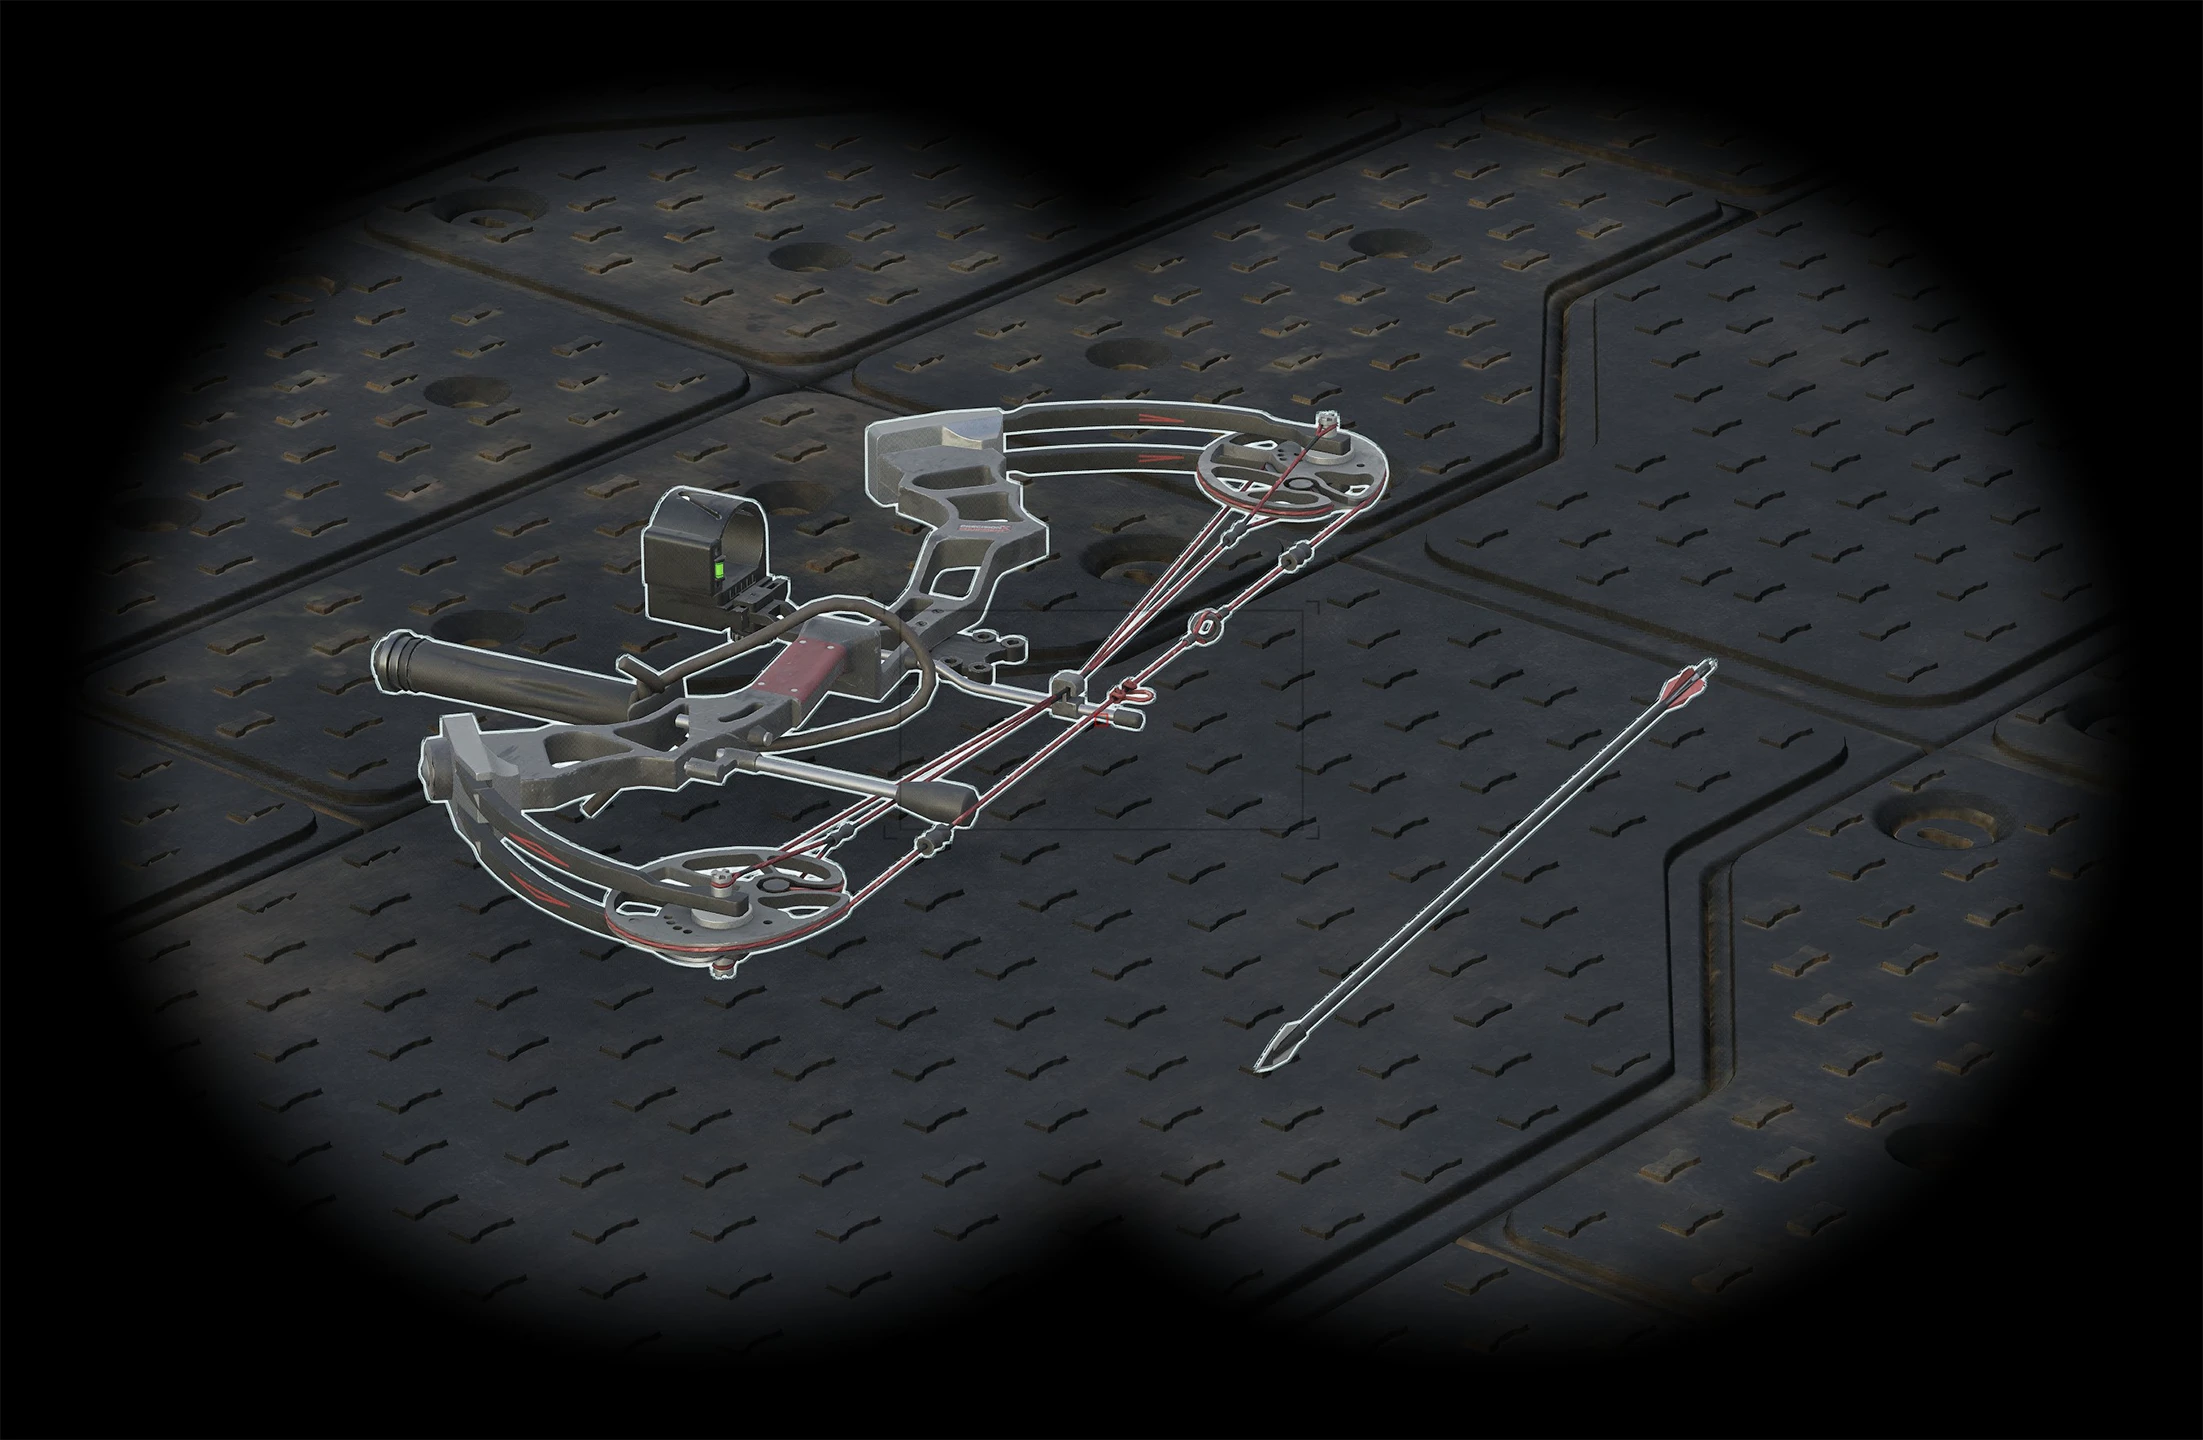
The Compound Bow unlocks at Recon 17 with Broadhead Arrows. One-time unlock is $75,000; the bow itself is only $800 at the vendor. Silent primary, pull-and-release, recon-tagged. Same rule as everything else on this track: spot to 17, pay the unlock, buy it when you want a quiet kit.
How to Get the Ghillie Suit in WARDOGS
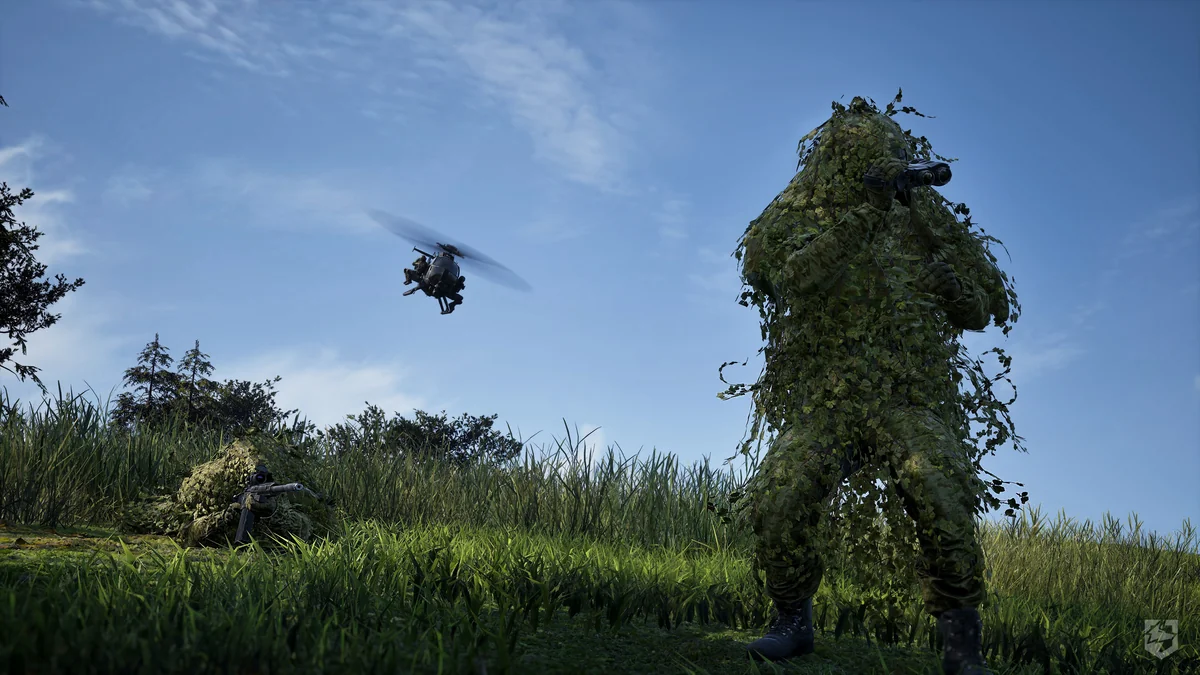
Ghillie is later than the SVD and the bow. Wear body and head together:
- Ghillie Body Suit + Ghillie Headwear — Recon 24, $140,000 unlock. About $3,000 / $2,500 to buy.
- Dead-pattern pair — Recon 27, $180,000 unlock.
Both sets hide you from infrared rangefinders and remove the death cam after you kill someone. That is why ghillie is the sniper endgame, not the starter kit. Get the spotting tools and SVD first.
Recon Unlock Roadmap
Headline items only. Attachments (brakes, bipods, mags, suppressors) fill the gaps. Full list with cumulative cost: Recon Track Unlocks.
| Level | Unlock | Toll |
|---|---|---|
| 2 | Monocular | $7,500 |
| 5 | SKS | $25,000 |
| 8 | Range Finder | $15,000 |
| 10 | Mosin Nagant | $50,000 |
| 11 | 3x-6x LPVO Short Dot | $15,000 |
| 12 | SVD + 5-rnd mag | $50,000 |
| 17 | Compound Bow + Broadhead Arrow | $75,000 |
| 18 | 6-10x Scope MRAD | $25,000 |
| 19 | SV98 | $100,000 |
| 22 | Claymore | $50,000 |
| 24 | Ghillie body + head | $140,000 |
| 25 | MK22 | $150,000 |
| 26 | 6-10x Scope MOA | $30,000 |
| 27 | Ghillie (Dead) | $180,000 |
| 30 | BMR-308 | $125,000 |
| 32 | Infrared Range Finder | $50,000 |
| 35 | AMR 50 | $200,000 |
| 43 | Frontier 2.5x-10x Precision Scope | $95,000 |
Claymores at 22 are the anti-push tool for a rooftop you intend to hold. Everything else in that table is rifles, glass, or camo.
FAQ
How do I get the sniper rifle in WARDOGS?
There is no class gate. The Scout Rifle TD is buyable from the start and is a poor single-shot gun. Level Recon by spotting, then unlock the SKS (5), Mosin (10), SVD (12), SV98 (19), MK22 (25), and AMR 50 (35). Check drill tower roofs for spawned rifles.
How do I unlock the SVD?
Recon level 12, then a $50,000 unlock. The rifle costs $4,800 at the vendor. Spot with binoculars or a monocular until you get there.
How do I get the monocular and the rangefinder?
Vendor: Equipment, then the Specialist slot (explosion / hammer / medkit icons), then Recon. Binoculars from the start ($75). Monocular at Recon 2. Range Finder at Recon 8. Infrared Range Finder at Recon 32. Until the next tier unlocks, keep using binoculars or whichever spotting tool you already have.
How do I get better scopes?
Most of the early track you run the cheap 6x Precision Rifle Scope ($680, from the start) — practice that. Later unlocks: 3x-6x LPVO at 11, 6-10x MRAD at 18, 6-10x MOA at 26, 6x marksman + reflex at 34, Frontier 2.5x-10x at 43. Buy them as attachments after the unlock. Drop and reticle UI both change, so train the glass you will actually use.
How do I get the compound bow?
Recon 17, $75,000 unlock, $800 to buy. Broadhead arrows unlock with it.
How do I get the ghillie suit?
Recon 24 for the standard body + head pair ($140,000 unlock). Dead pattern at 27. You must wear both pieces. They hide you from IR rangefinders.
Is Recon a class? Do I have to snipe?
No locked classes. Recon is a progression track. Spotting levels it without a sniper: 25 XP per infantry tag, 150 more when they die. A recon-weapon kill is 250 XP (350 at long range). Unlocked items mix with any other track. Keys: 1 primary, 2 sidearm, 3 specialist (rangefinder). Muzzle devices and bipods also sit on Recon. Early on, even with a rifle, hold fire until you have cash.
Should I snipe as soon as I have a rifle?
Not when you are just starting. Even if you already bought a sniper, keep spotting until you have some money. Shooting attracts attention and you get sniped back. Tags pay without giving the roof away. Full note: don't shoot until you have a stack.
Do I get XP if someone else kills my tagged target?
Yes. That is a separate payout from the tag itself. Tagging an infantry player is $100 and 25 Recon XP. When they die you get another $400 and 150 XP — including crashes, other teams' kills, and failed parachutes. Vehicles and FOBs pay more; see What Spotting Pays.
How much XP does spotting give?
Infantry: 25 XP on the tag, 150 XP when they die (175 total). A spawn vehicle tag-plus-wreck is 600 XP. A recon-weapon kill is 250 XP, or 350 for a long-distance kill. Numbers are from the closed-beta datamine and can change at Early Access.
How do I find good recon or sniper spots?
Open the viewshed tool on the Ozeti or Bakurani map and click a roof or ridge. Green is the visibility footprint from that point. It is still rough (terrain only, no buildings). A 3D fly-around of the same maps is almost ready for picking perches by eye.
How do I practice sniping / learn bullet drop?
Firing Range from the main menu, turn right. Same vendors as spawn, but everything is $0 (even locked snipers). Buy a pistol to shoot the rail-target buttons, extra ammo, and the cheap 6x. Press F on the second lever for a bullet cam. While scoped, Page Up / Page Down zeros in 100 m steps — match the rangefinder number and use the red dot. Reload: reload guide. In a match: Range Finder for meters, 1 rifle, 3 rangefinder, then zero. Binoculars and the monocular do not show range. Numbers: sniper calculator.
Do binoculars or the monocular show distance?
No. Only the Range Finder (Recon 8) and Infrared Range Finder (Recon 32) print the meter readout. Spot with a rangefinder once you have it, then zero the rifle to that number.
How do I zero a sniper scope / compensate for bullet drop?
While scoped, Page Up and Page Down walk the zero in 100 m steps. The current distance shows on the glass. Set it to the rangefinder number and aim with the red dot. Between ticks (450 m target, 400 m zero) the extra hold is tiny — not even the next notch. Full drill: zero with Page Up / Page Down.
How do I see players through trees when spotting?
Stop panning. Rest the optic for a second and let movement pop — that is how you catch people through trees and leaves, and it gets better with time. Then follow tracers: if your team is on the left, look right for the shooters and tag them; they are already shooting that way, so the map mark helps the squad and your XP. Full drill: rest the glass, then follow the gunfire.
What do drill towers do?
They are a main map objective. Squads plant FOBs around them. After a tower unlocks, capture it on the third-floor computer console. Hold enough of them and the hot zone (the small circle inside the Control Zone, where each player counts as two on the score ticker) slides toward you. Better snipers also spawn on the roof. See Drill Towers, Capture & the Hot Zone.
New to WARDOGS? Start with the beginner's guide. Spotting is also one of the best civilian money makers in the money guide — and if you are still broke, do not start sniping yet. For the shot itself, zero with Page Up / Page Down and keep the sniper calculator for the leftover hold. To pick a roof before you drop, use the map viewshed.